


How to connect HiveOS to Kryptex XMR pool
You can mine in Kryptex directly without an application, but keep in mind that you will NOT have access to the cool features of the application, created for convenience, clarity and maximum profitability. 💪
Install Kryptex! It has a lot of great features:
- Remote monitoring and control.
- Remote tuning of the rig in real time.
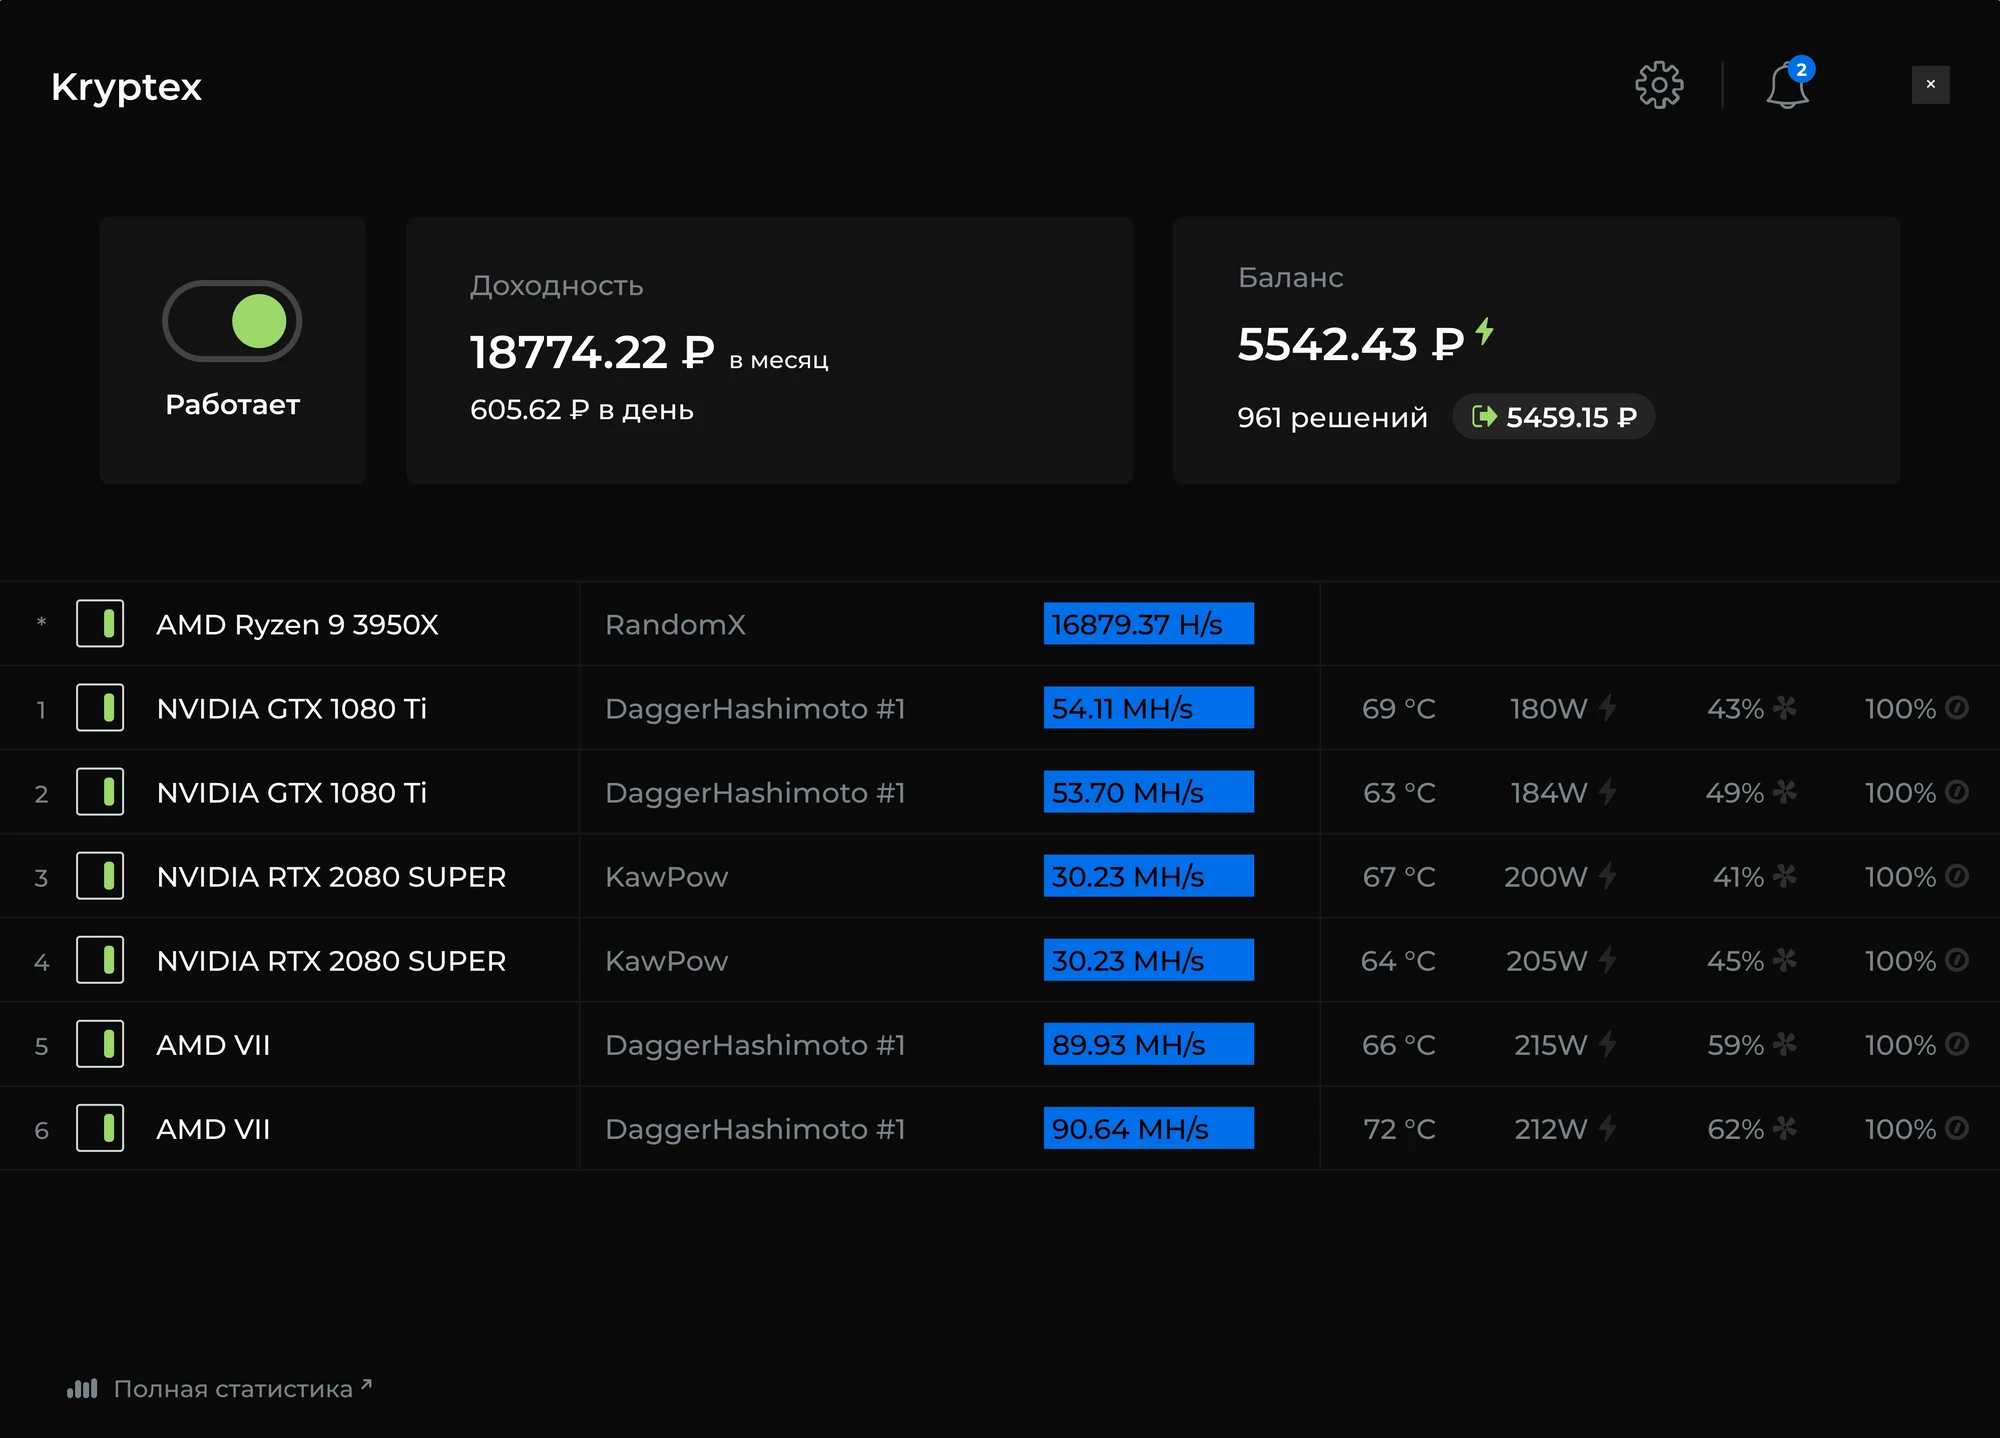
- Extended statistics with hash rate, temperature, power consumption.
- Flexible algorithm settings
Notifications about issues, recent news and updates.
What to begin with?
First, choose the mining method.
You can mine to a Kryptex account directly, or you can mine to a pool. What is the difference?
- Mining to your account directly — all money is stored on your Kryptex account in bitcoins.
- Pool Mining — you mine the Monero XMR cryptocurrency to your Monero XMR wallet that you registered for earlier.
To mine on a Kryptex account without the app, you will need the following:
- *Register at Kryptex and confirm your email.*
- *Install and configure HiveOS.*
Configs for the HiveOS:
- Pool address:
xmr.kryptex.network:7029 - Wallet:
your-email@gmail.com - Password: leave blank or enter
x
your-email@gmail.com — your email, registered in Kryptex.
Setting up HiveOS
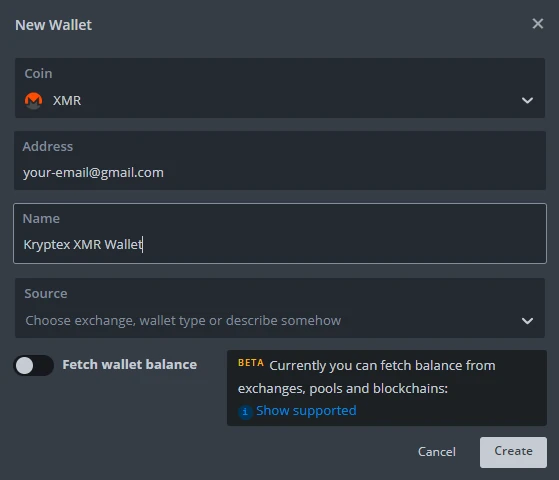
- Create the wallet for the XMR coin
- Enter the wallet address as follows
your-email@gmail.com— your email, registered in Kryptex. Name the wallet as you wish and apply the settings
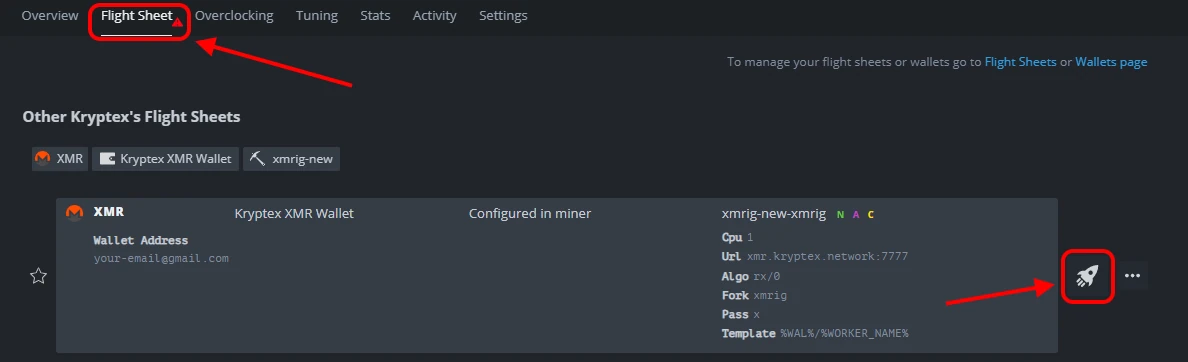
Let's create the Flight Sheet for your worker
- Choose the
XMRcoin - Choose already created wallet from the list
- Skip pool settings and choose the option "Configure in miner"
Choose the XMRig (new) miner and press "Setup Miner Config"
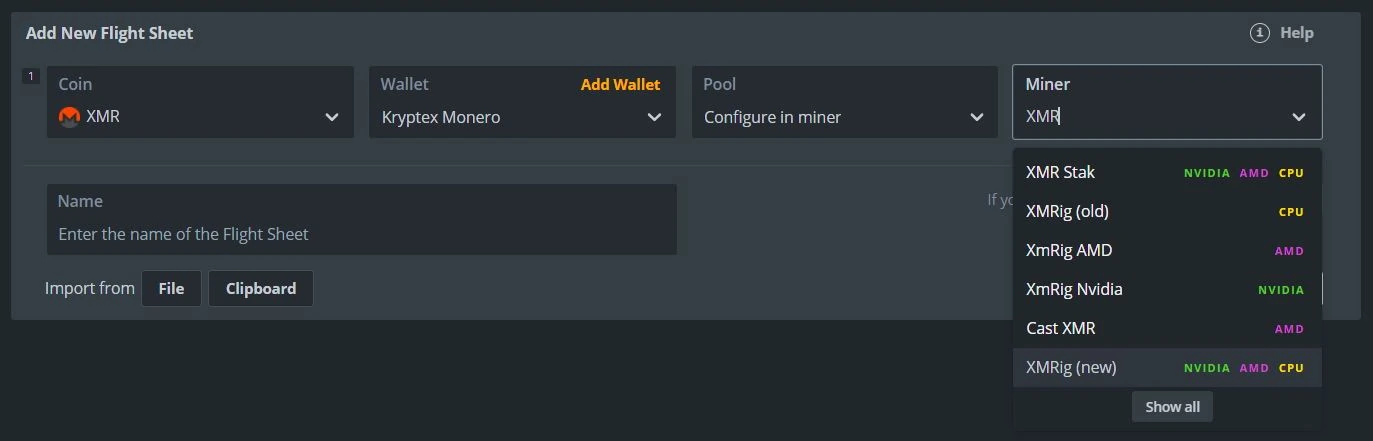
Please note that other miners could be unstable or will not work at all. We recommend
XMRig (new)miner.
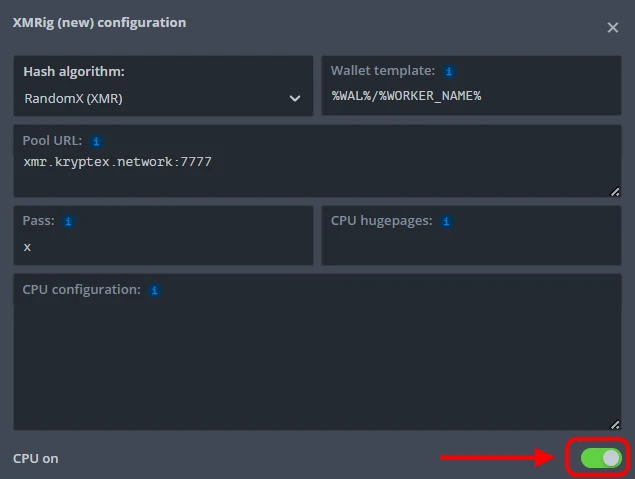
Let's configure the miner:
- Choose the hash algorithm
RandomX (XMR) - Enter wallet template
%WAL%/%WORKER_NAME% - Enter
xin "Password" cell (or leave it blank) - Enter Pool URL
xmr.kryptex.network:7029 - Switch on the
CPUmining option And apply your settings. That's it!
At this step, you can add additional parameters for more efficient mining. All possible parameters could be found on the developer's page
Let's start mining!
- Boot up the HiveOS from your bootable media, establish the network connection, enter your RIG_ID and RIG_PASSWORD, and wait until HiveOS boots up
Once the OS is loaded, enter your HiveOS personal cabinet, choose your Rig and Worker, and start the Flight Sheet pressing the "Rocket" button
If you did everything right, you will see the statistics within 15-20 minutes.
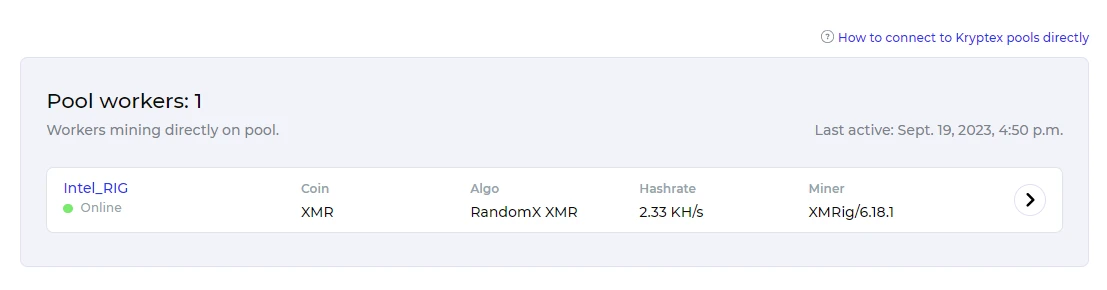
All information concerning the mining rig statistics will be shown at HiveOS personal cabinet
Need Help?
Have any questions, something is unclear, or you can't connect?
Contact support — we're happy to assist!
- Support Ticket.
- Telegram Support.
- Discord Support.
- Email support at support@kryptex.com.
