

Flashing AMD RX 470/480/570/580 BIOS
By tweaking the -strap, -sintensity, and -rxboost options, you also can adjust the timings of your GPUs and increase hashrate by 10-20% depending on a GPU model and memory chips installed.
The benefits of the flashed GPU BIOS
Stock AMD RX 470/480/570/580/590 are capable of 22-24 MHs/s mining Ethereum using DaggerHashimoto. You can push up to 29-31 Mh/s by tuning the memory clock. We covered this approach here, yet, you still can squeeze some more by reflashing your GPU's BIOS with lower memory timings.
Lowering memory timings may help to push a card even further and provide up to 31 Mh/s — a 7-9Mh/s increase! The only way to do so with an AMD GPU is to flash BIOS. For Nvidia cards, there is "The Pill".
Why bother?
RAM and VRAM are types of Dynamic Random-Access Memory. As a whole, it has two major parameters:
Frequency, which impacts the memory's speed. The higher the value, the faster the data is transferred.
Timings, which define the latency between read and write operations. These latencies are crucial for stable memory performance, but they are not optimized with mining in mind. We can fix that 😏
Imagine yourself driving a Ferrari. Your car can reach 250 Km/h of frequency. But, you are always stuck at traffic lights of timing/latency at every corner. So, what is the point of that speed limited by obstacles?
There are three ways to boost DRAM chips:
- Raise frequency;
- Lower timings;
- Or both. Why not?
Which cards can be reflashed using this method?
Theoretically speaking, any kind. But most of the cards would require complicated microcode edits. AMD 400/500 series, on the other hand, allows you to use Polaris BIOS Editor app to apply custom modifications. It is a simple method which doesn't require any specialized hardware.
Are there any risks?
Indeed, there are some risks associated with BIOS modifications, but with careful planning and following our instructions, those risks are easily avoidable.
Warranty void
No service center will provide you with free maintenance if they find out that any BIOS changes were applied. Reverse all the modifications before handing your GPU to a vendor.
Potentially shorter life-span
Manufacturers test their product using stock parameters and make assumptions about life-span, assuming that the product is working in the same conditions as a test bench. Pushing your GPU's capabilities beyond those may bring unpredictable consequences to card's work state and lifetime. Frankly, that applies to any overclocking and the mining process itself, so...
Unstable mining
Mining relies on long-term stability and reliability, not immediate blast power. The Ferrari example above is still applicable — there is no point of going lightning fast for a split second just to get stuck turning into a snail a moment later.
It's not only about miner crashing or PC hanging. It's also about calculations precision. Overstressed GPU might think that 2+2=5, thus generating an invalid share. Such shares do not get rewarded by a pool; therefore your profitability will decrease.
Visual artifacts in games
Flashed GPUs are prone to display random green lines or blinking noisy squares on a screen while playing games. Sometimes the driver can even stop responding, resulting in an immediate game crash or even a BSOD.
Be conscious about the risks before considering modifying the timings. Test your GPU thoroughly after flashing or stick to a soft memory overclock if in doubt.
Go-go, Power Flashers!
The process may seem complicated. But, if you'll carefully follow these steps, everything will work out.
You will need to:
- Install the latest AMD driver which is optimal for mining;
- Enable Compute Mode;
- Apply atikmdag-patcher to bypass driver's BIOS validation;
- Figure out your memory's manufacturer and backup stock BIOS, both using GPU-Z;
- Modify BIOS with Polaris BIOS Editor;
- Flash it with AtiFlash;
The process for AMD 400 and 500 series is the same. In our example, we are using MSI RX480 GamingX with Samsung memory chips. Performance is measured for Ethereum mining. The stock performance is 24Mh/s.
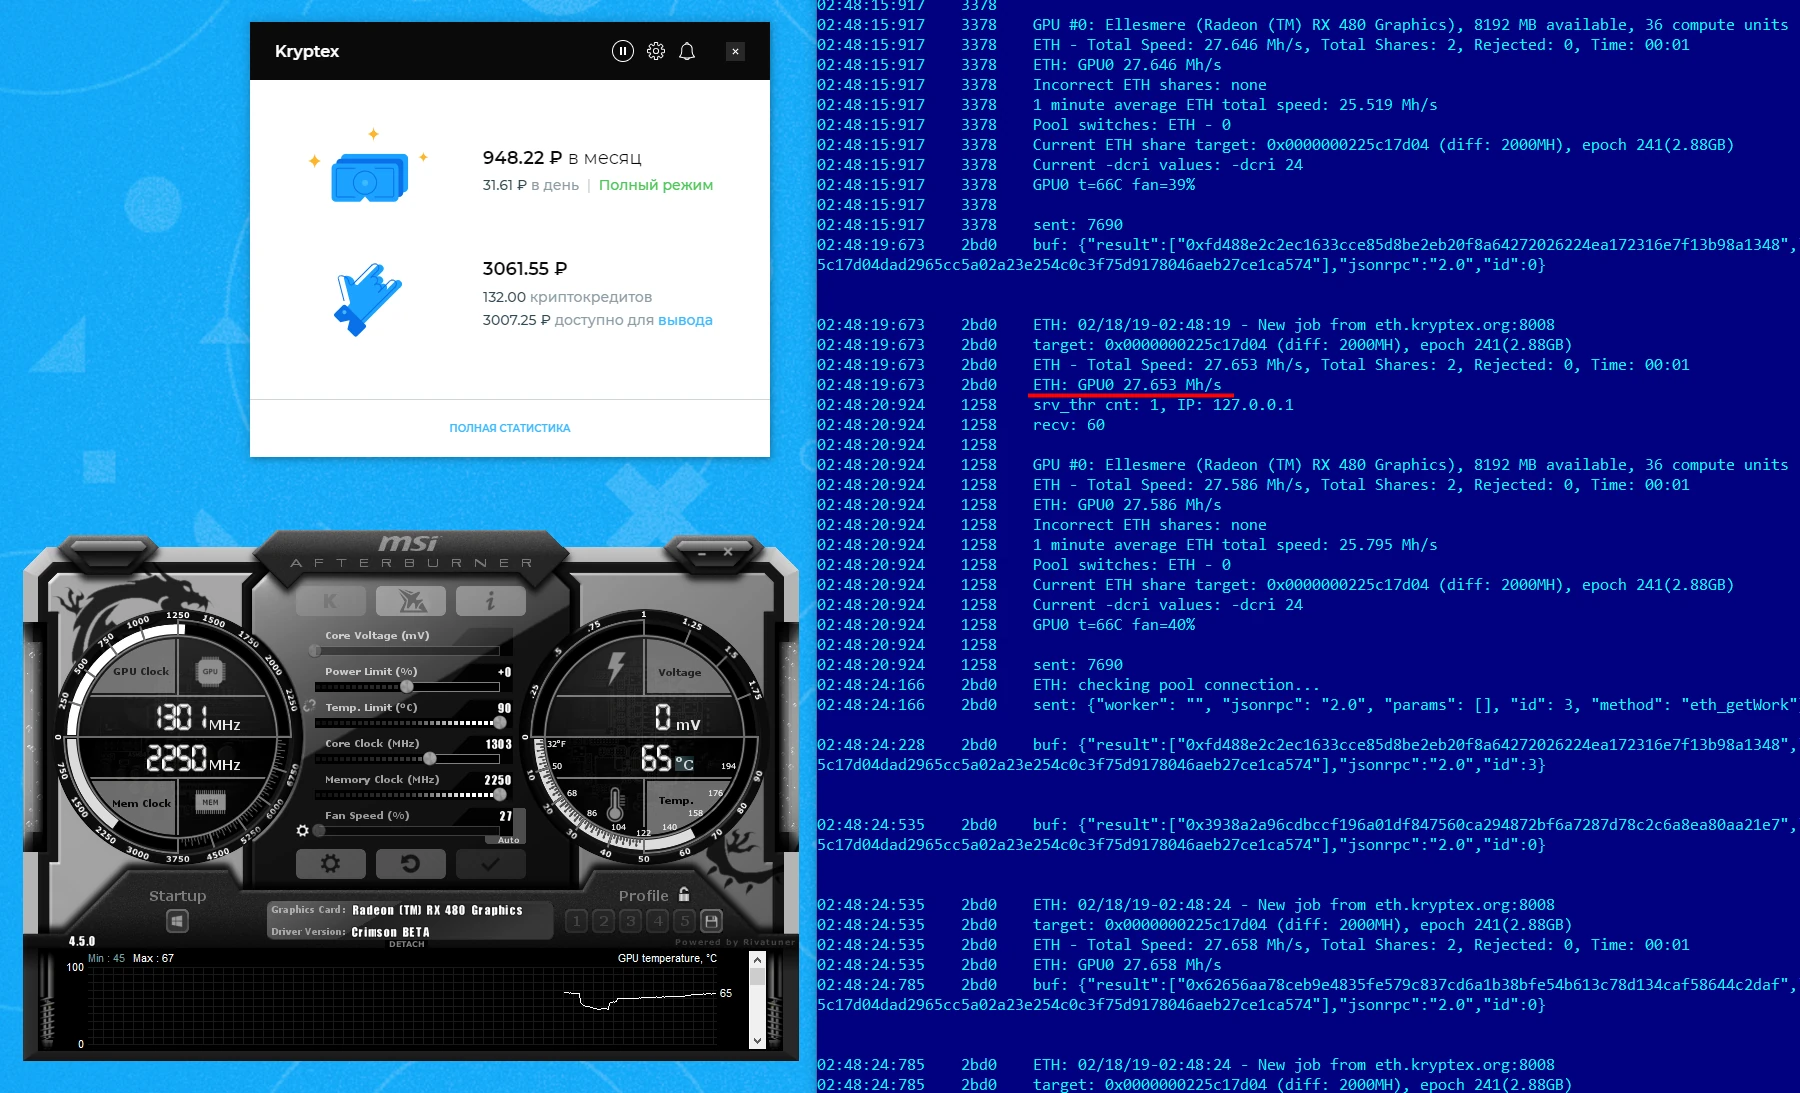
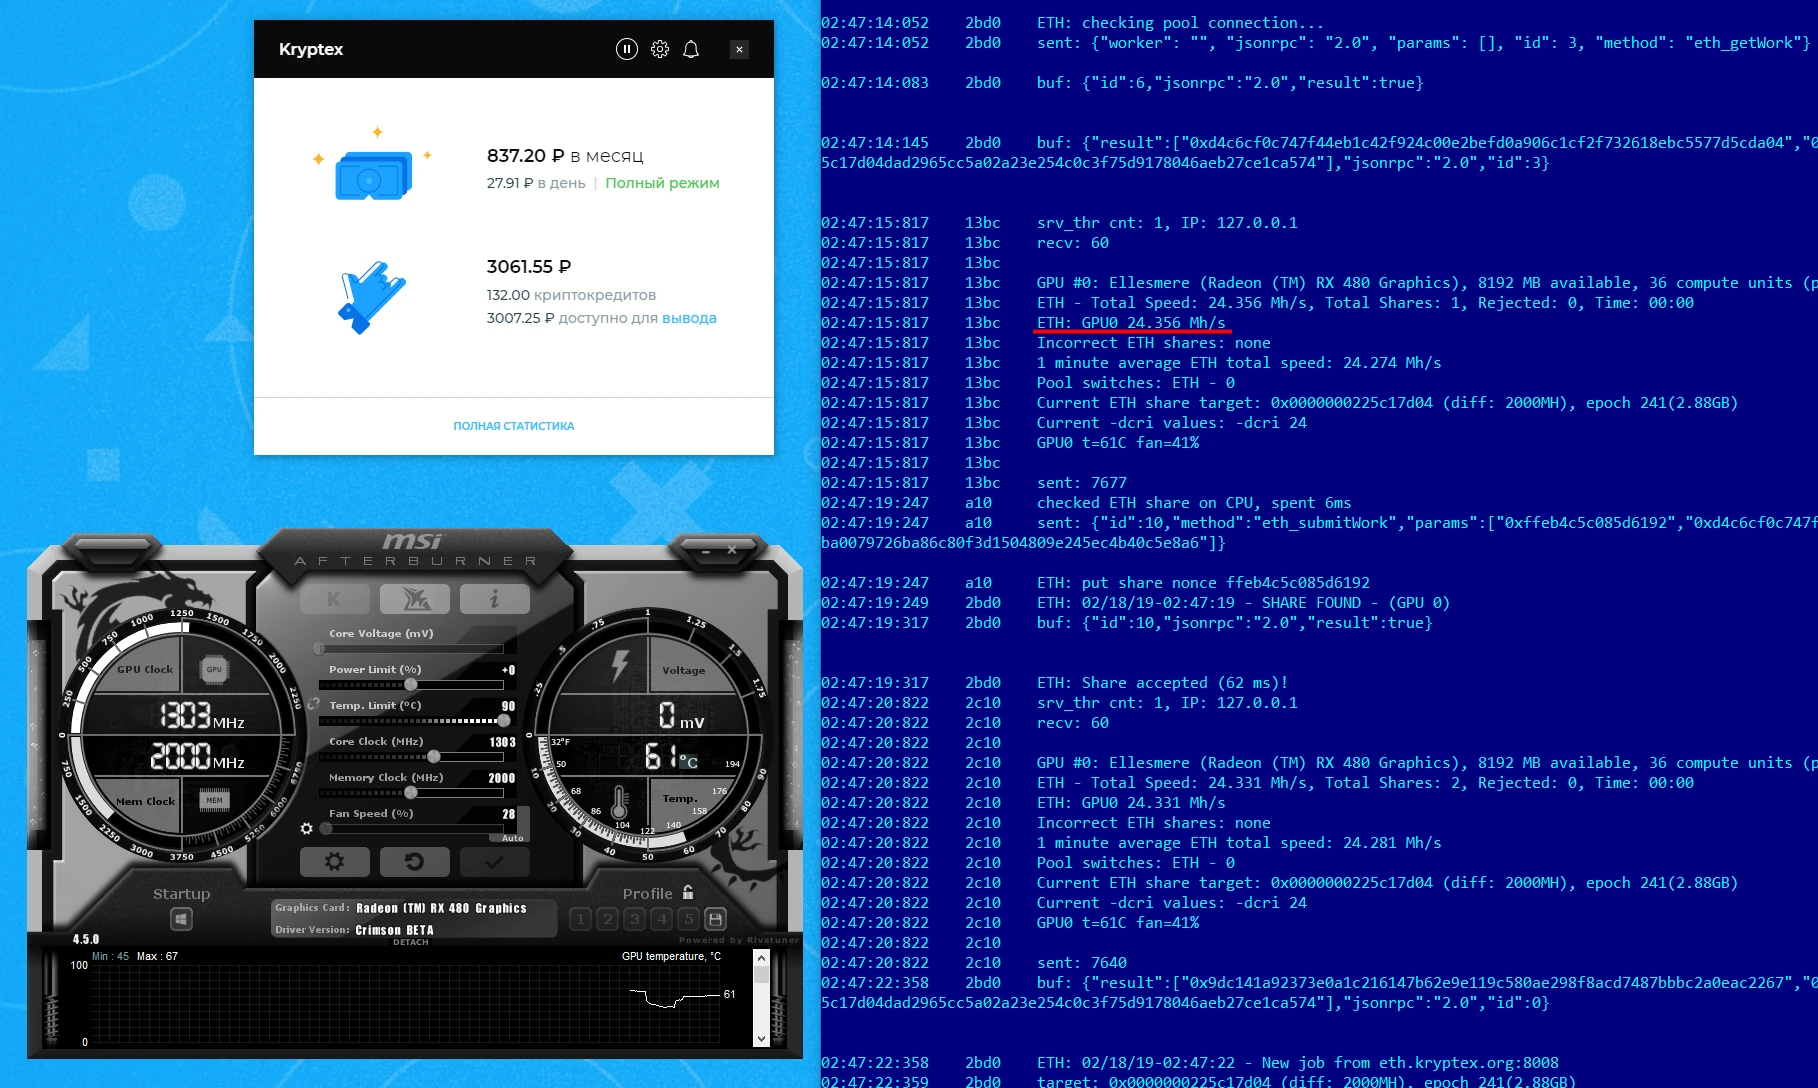 We've got 27Mh/s after applying a memory overclock. That's 12% more than stock. All right, but not very impressive.
Install an optimal driver
Install the latest AMD GPU driver and enable Compute Mode. Reboot your PC after the installation is complete.
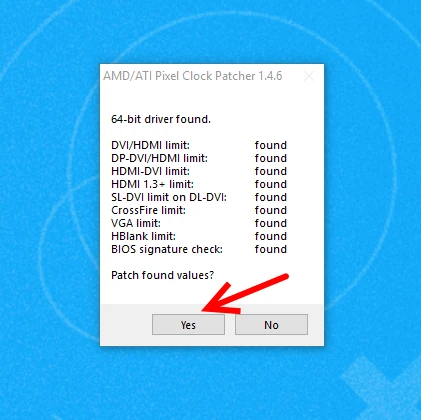
Apply the patch
Launch atikmdag-patcher.exe to disable BIOS checksum check. A driver will be unable to detect your GPU after BIOS reflash if you skip this step.
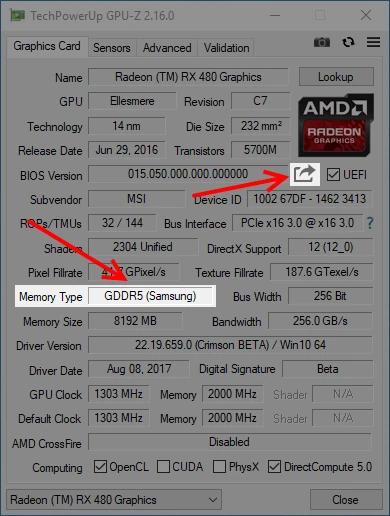
Backup your stock BIOS
Using GPU-Z do the following:
- Find out what memory chips are installed on your board;
Backup the stock BIOS: 1. Click on the arrow under AMD Radeon logo; 2. "Save to file..." and choose the folder to backup your BIOS to.
Copy the file to a secure place, i.e., Google Drive. You'll be able to safely revert any changes using the original BIOS.
Modify the BIOS
Open Polaris Bios Editor. It allows you to change clock speeds, voltages, TDP, temp limits and timings directly in BIOS.
Click "OPEN BIOS" at the top left corner and select a file you have just dumped using GPU-Z.
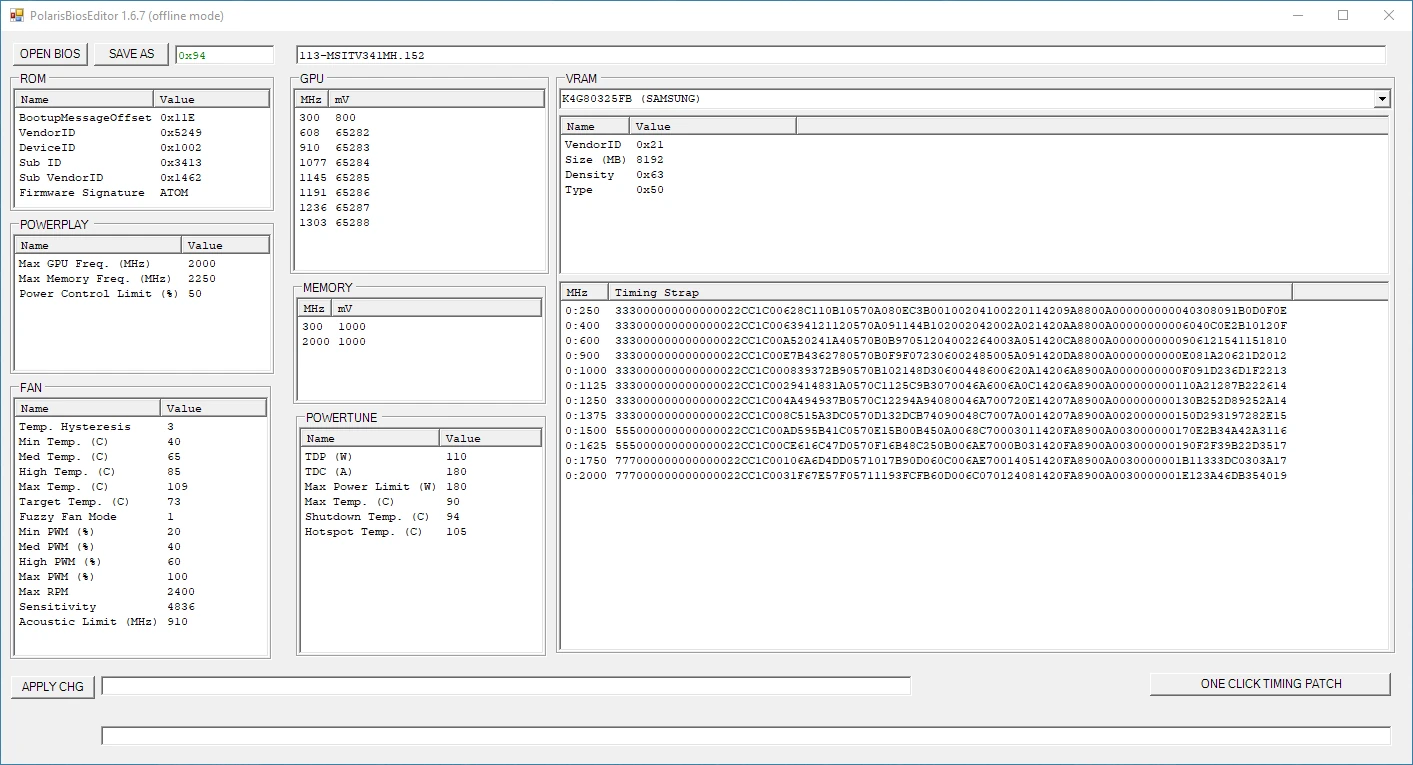
Pay attention to a section in a lower-right. For each memory clock available for a GPU you'll find a Timing Strap value, which can be modified in three ways:
- Using "ONE CLICK TIMING PATCH" button. The app will automatically set timings from a safe built-in preset. Choose this option if you are not sure what timings you should set.
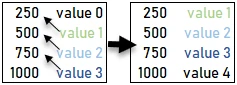
Shift the values up and use N-th timing strap for an N-1 frequency, as shown in the picture below:
Find the best strap value for your card/memory vendor on the Internet. We consider this method the riskiest since a card might not boot up if the incorrect timings are applied.
After finishing all the manipulations, save your modified BIOS to a separate file.
Do not overwrite stock BIOS! Use self-explanatory names to distinguish different BIOSes.
Flash your new BIOS
Launch AtiFlash with an 🛡Administrator Privileges.
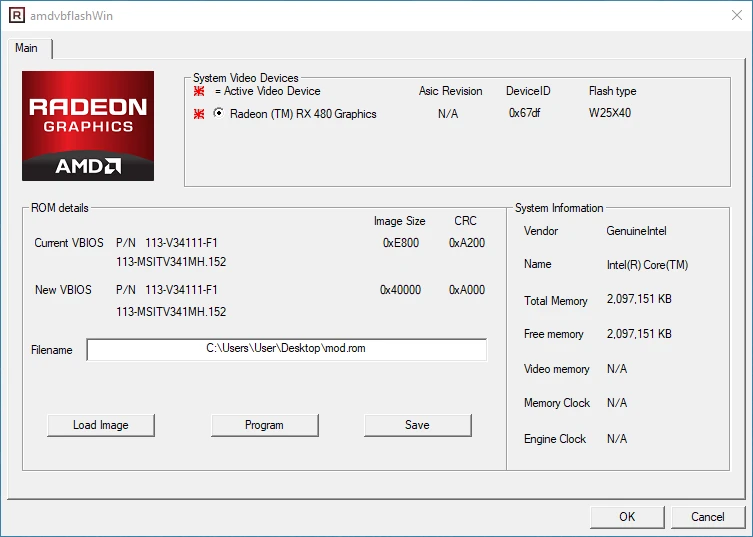
- Select the required card, if there are several in your PC;
- Click on "Load Image" to select the modified BIOS file;
- Finish with "Program" button, flashing the code to the memory;
- Reboot your PC.
Who is awesome? You are awesome!
You got it! The GPU is ready to bring you millions... well, maybe not dollars, but hashes for sure!
Remember that RX480 from the beginning? This is him now at stock clocks:
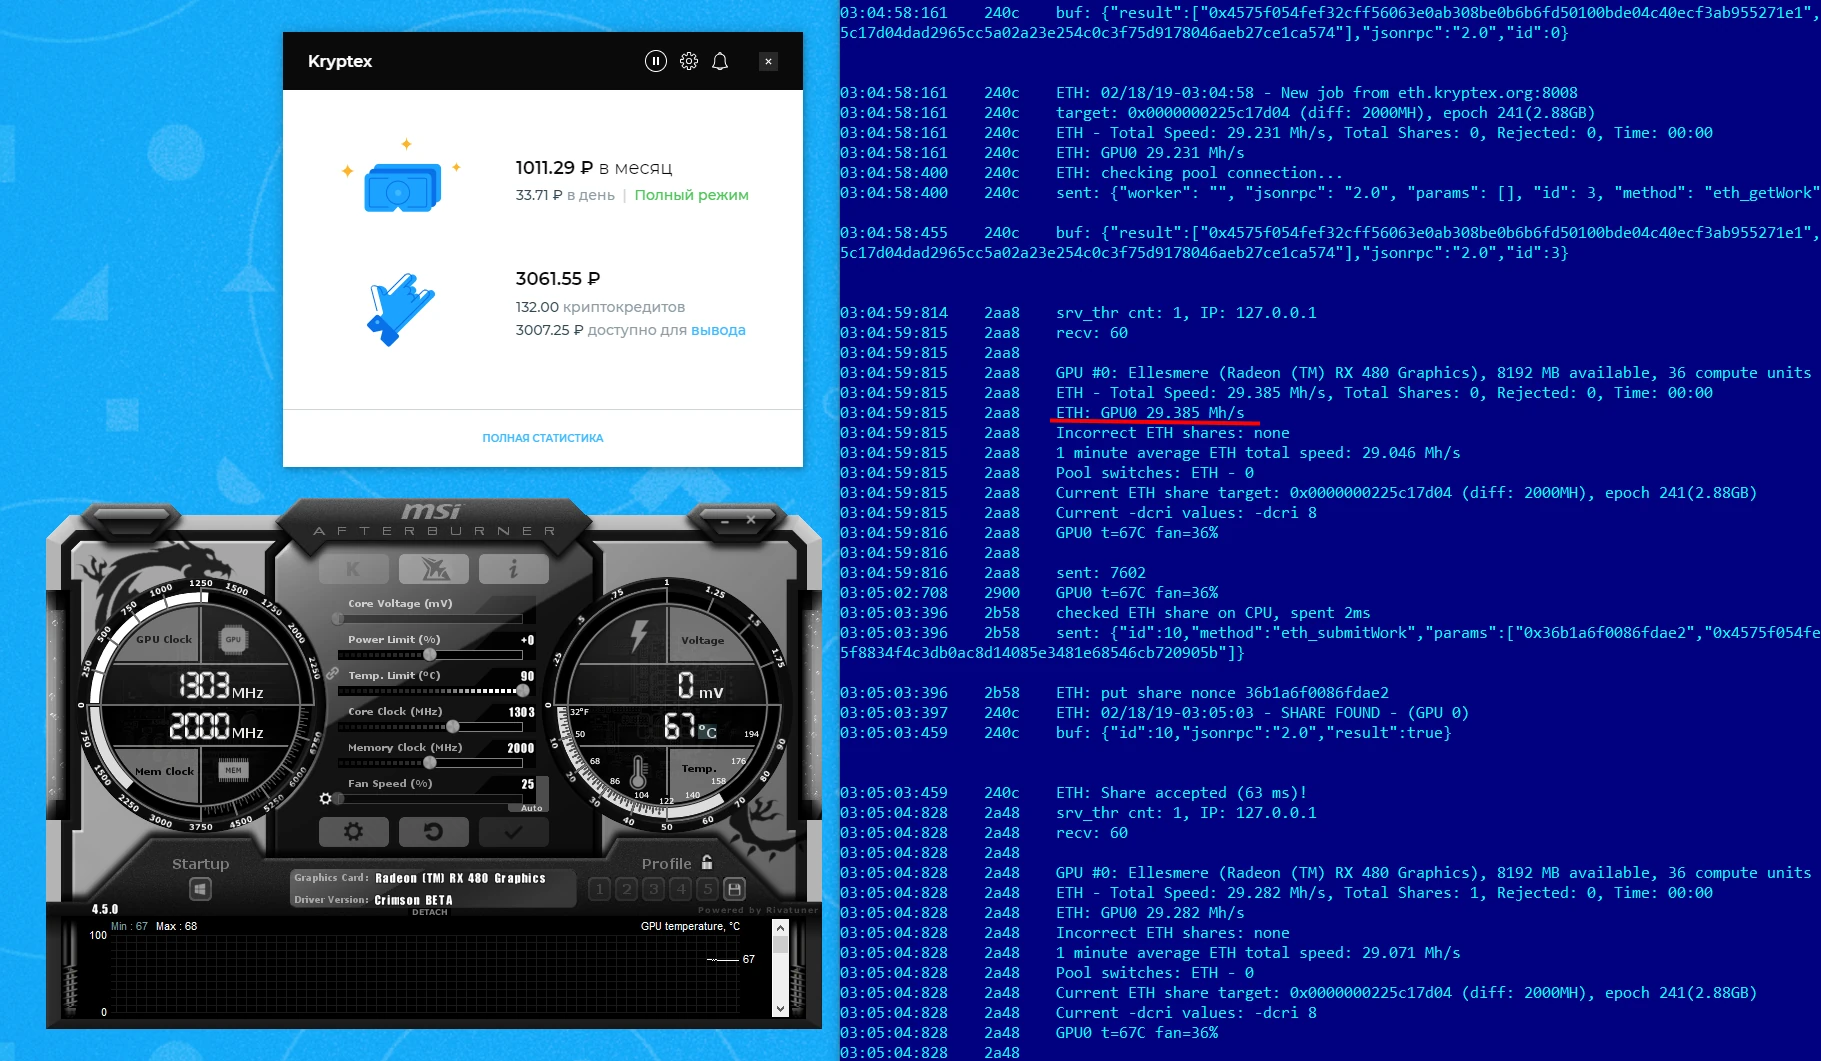 Overclocking helps to achieve up to 30-31 Mh/s. In total, that's a 25% boost compared to stock BIOS and clocks.
In case something went wrong 🛑
Flash your stock BIOS back if you notice some unusual behavior.
Display goes blank
Connect your output cable to an integrated graphics or to a different GPU if you have several. Use the same AtiFlash steps to revert your card to a stock BIOS.
AtiFlash doesn't detect a card
Contact the closest service center and ask a professional to use programmer hardware to flash your stock BIOS. Make sure to grab a thumb drive with BIOS dump.
Card is not detected by a driver
Run atikmdag-patcher one more time.
Lost stock BIOS
Try searching Techpowerup BIOS database. Make sure BIOS you download corresponds to your GPU's memory vendor. For example, a GPU with Samsung's VRAM will not work with Micron's BIOS.
Need Help?
Have any questions, something is unclear, or you can't connect?
Contact support — we're happy to assist!
- Support Ticket.
- Telegram Support.
- Discord Support.
- Email support at support@kryptex.com.
