

How to configure the BIOS for mining
Why should I configure the BIOS?
BIOS is a low-level hardware setting that helps you configure your hardware for stable and effective work.
The manufacturer sets the BIOS generally for the average user at the factory. But mining isn't everyday use and requires a unique configuration.
If you haven't configured the BIOS correctly, miners can crash or work unstable, and in some cases, the whole computer can even shut down, reboot, or get stuck. Rigs crash leads to loss of earnings, nerves, and headaches. In this article, we will tell you what you should set to get the most stable earnings 😉
What are the risks?
You are at no risk! On the contrary, you will only increase the stability of the system. Anyhow, you can always reset your BIOS to the factory settings!
Changing BIOS settings doesn't affect your hardware warranty!
Let's get started! 😎
The BIOS setup procedure may seem complicated, but you'll be fine if you follow our advice!
Go to the BIOS
There are two ways to go to the BIOS menu:
Press
DelorF2buttons while turning on your computer. Usually, the key you need will pop up on the screen.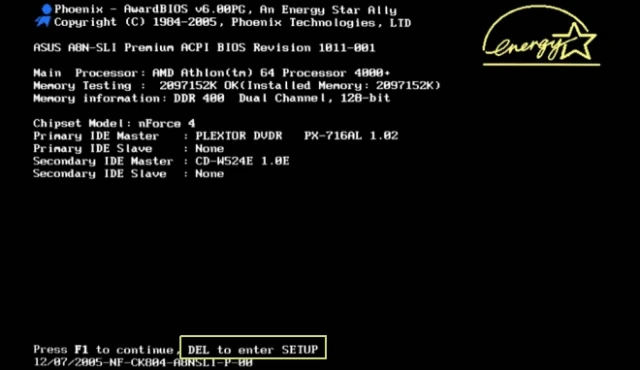
On Windows 10 and 11, the first method doesn't always work. In that case, try this:
- Go to the Restart -> Shutdown menu;
- Hold Shift and click Reboot;
- You will see the menu with a blue background;
- Go to Diagnostic -> Advanced Options -> UEFI Firmware Options;
- The computer should automatically boot into the BIOS.
Some BIOS require you to enable Advanced Mode to access all settings.
Enable “Above 4G Decoding”
Without Above 4G Decoding enabled, the DaggerHashimoto algorithm might not work, so set it to Enabled.
What does this setting do?
Before the processor operates the data received from the video card, it is stored in RAM. Above 4G Decoding allows you to use more than 4 GB of RAM in data exchange mode.
If you have less than 4GB of RAM, Above 4G Decoding does not need to be enabled, or it may cause the image to display incorrectly.
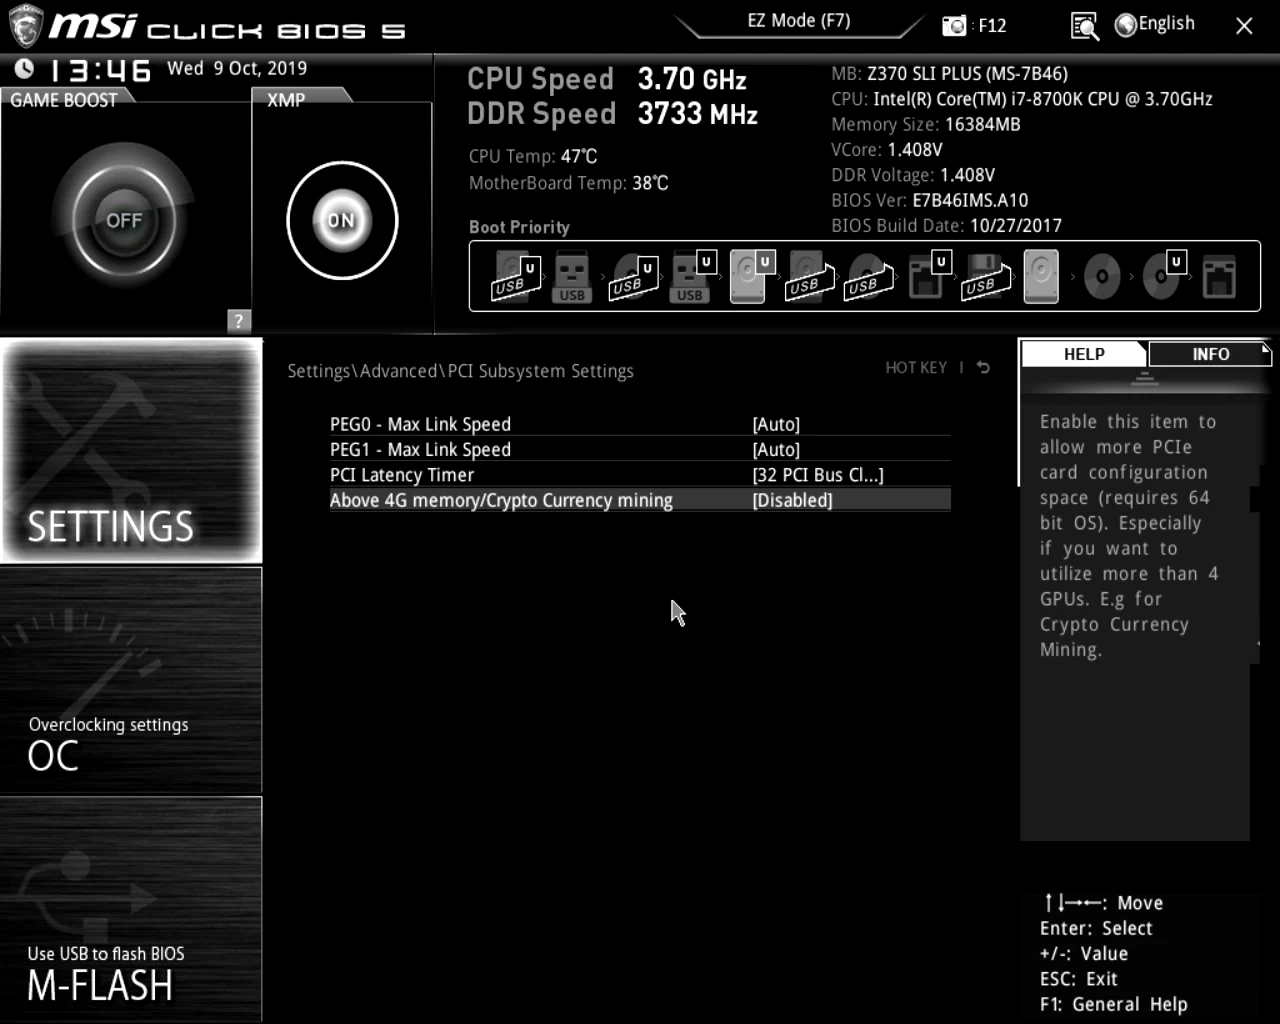
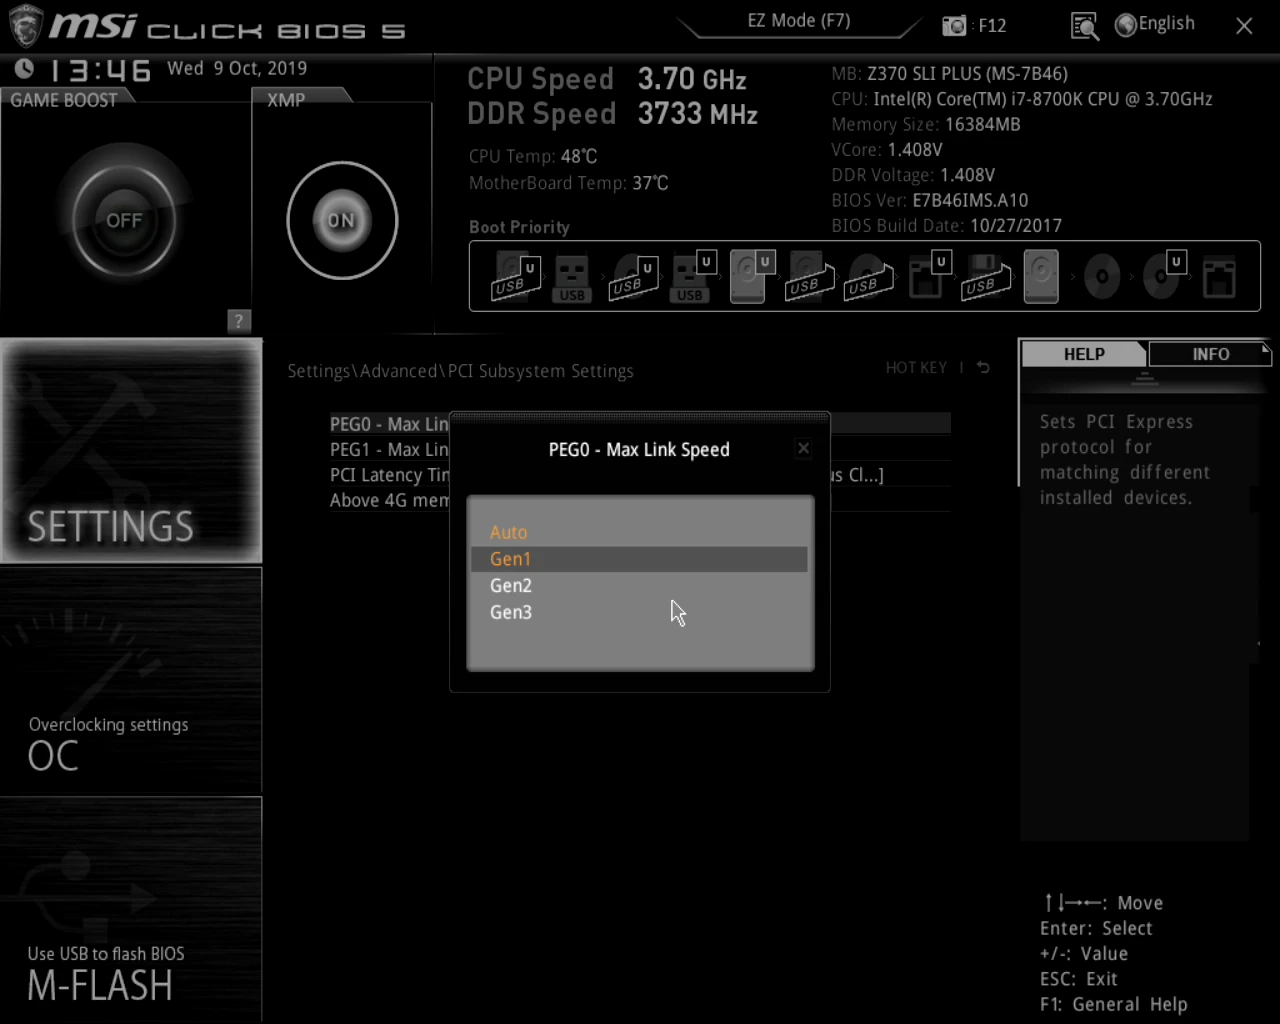
Reduce the PCI Express speed
The higher the PCI Express slot speed is — the lower its stability is.
Unlike gaming, almost no data is transferred across the bus during mining. The graphics card sends a small amount of data - shares - to the miner just once every couple of seconds, so we can lower the PCI Express slot bandwidth without sacrificing profitability.
Set the PCI-e x16 Link Speed setting to Gen2 or Gen1.
If you're gaming or using the GPU for work, it's worth testing the performance after lowering the PCI-e bandwidth
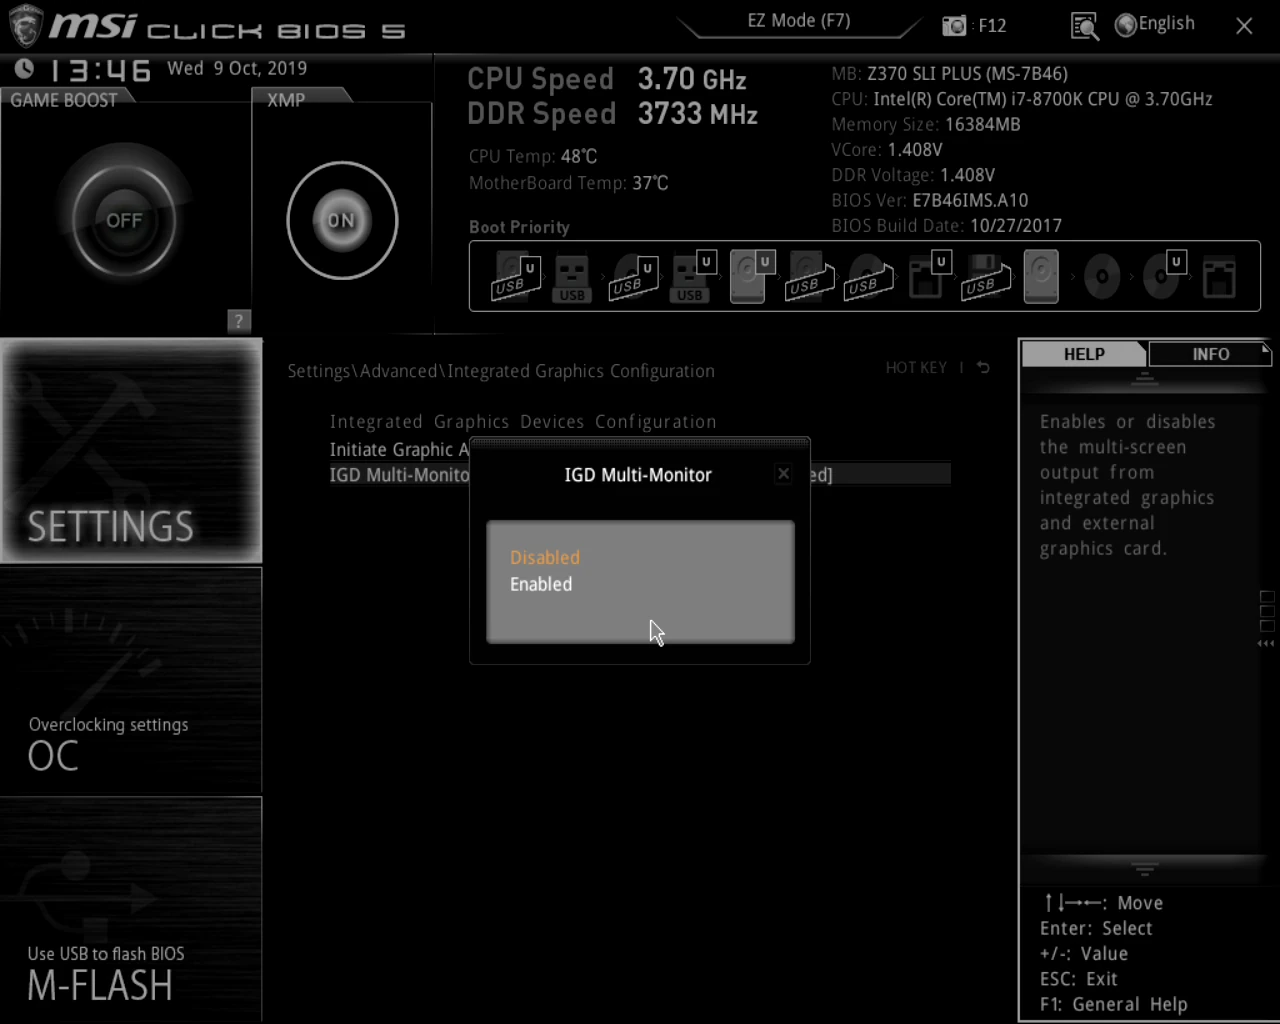
Disable built-in (integrated) Graphics Card
The built-in graphics card is not used for mining but constantly conflicts with the video card when mining. To free up resources for mining tasks, disable the built-in graphics. To do this, set the Internal Graphics setting to 0 MB or Disabled.
If you are using the built-in video card for image output, it is better to leave the value between 32 MB and 64 MB
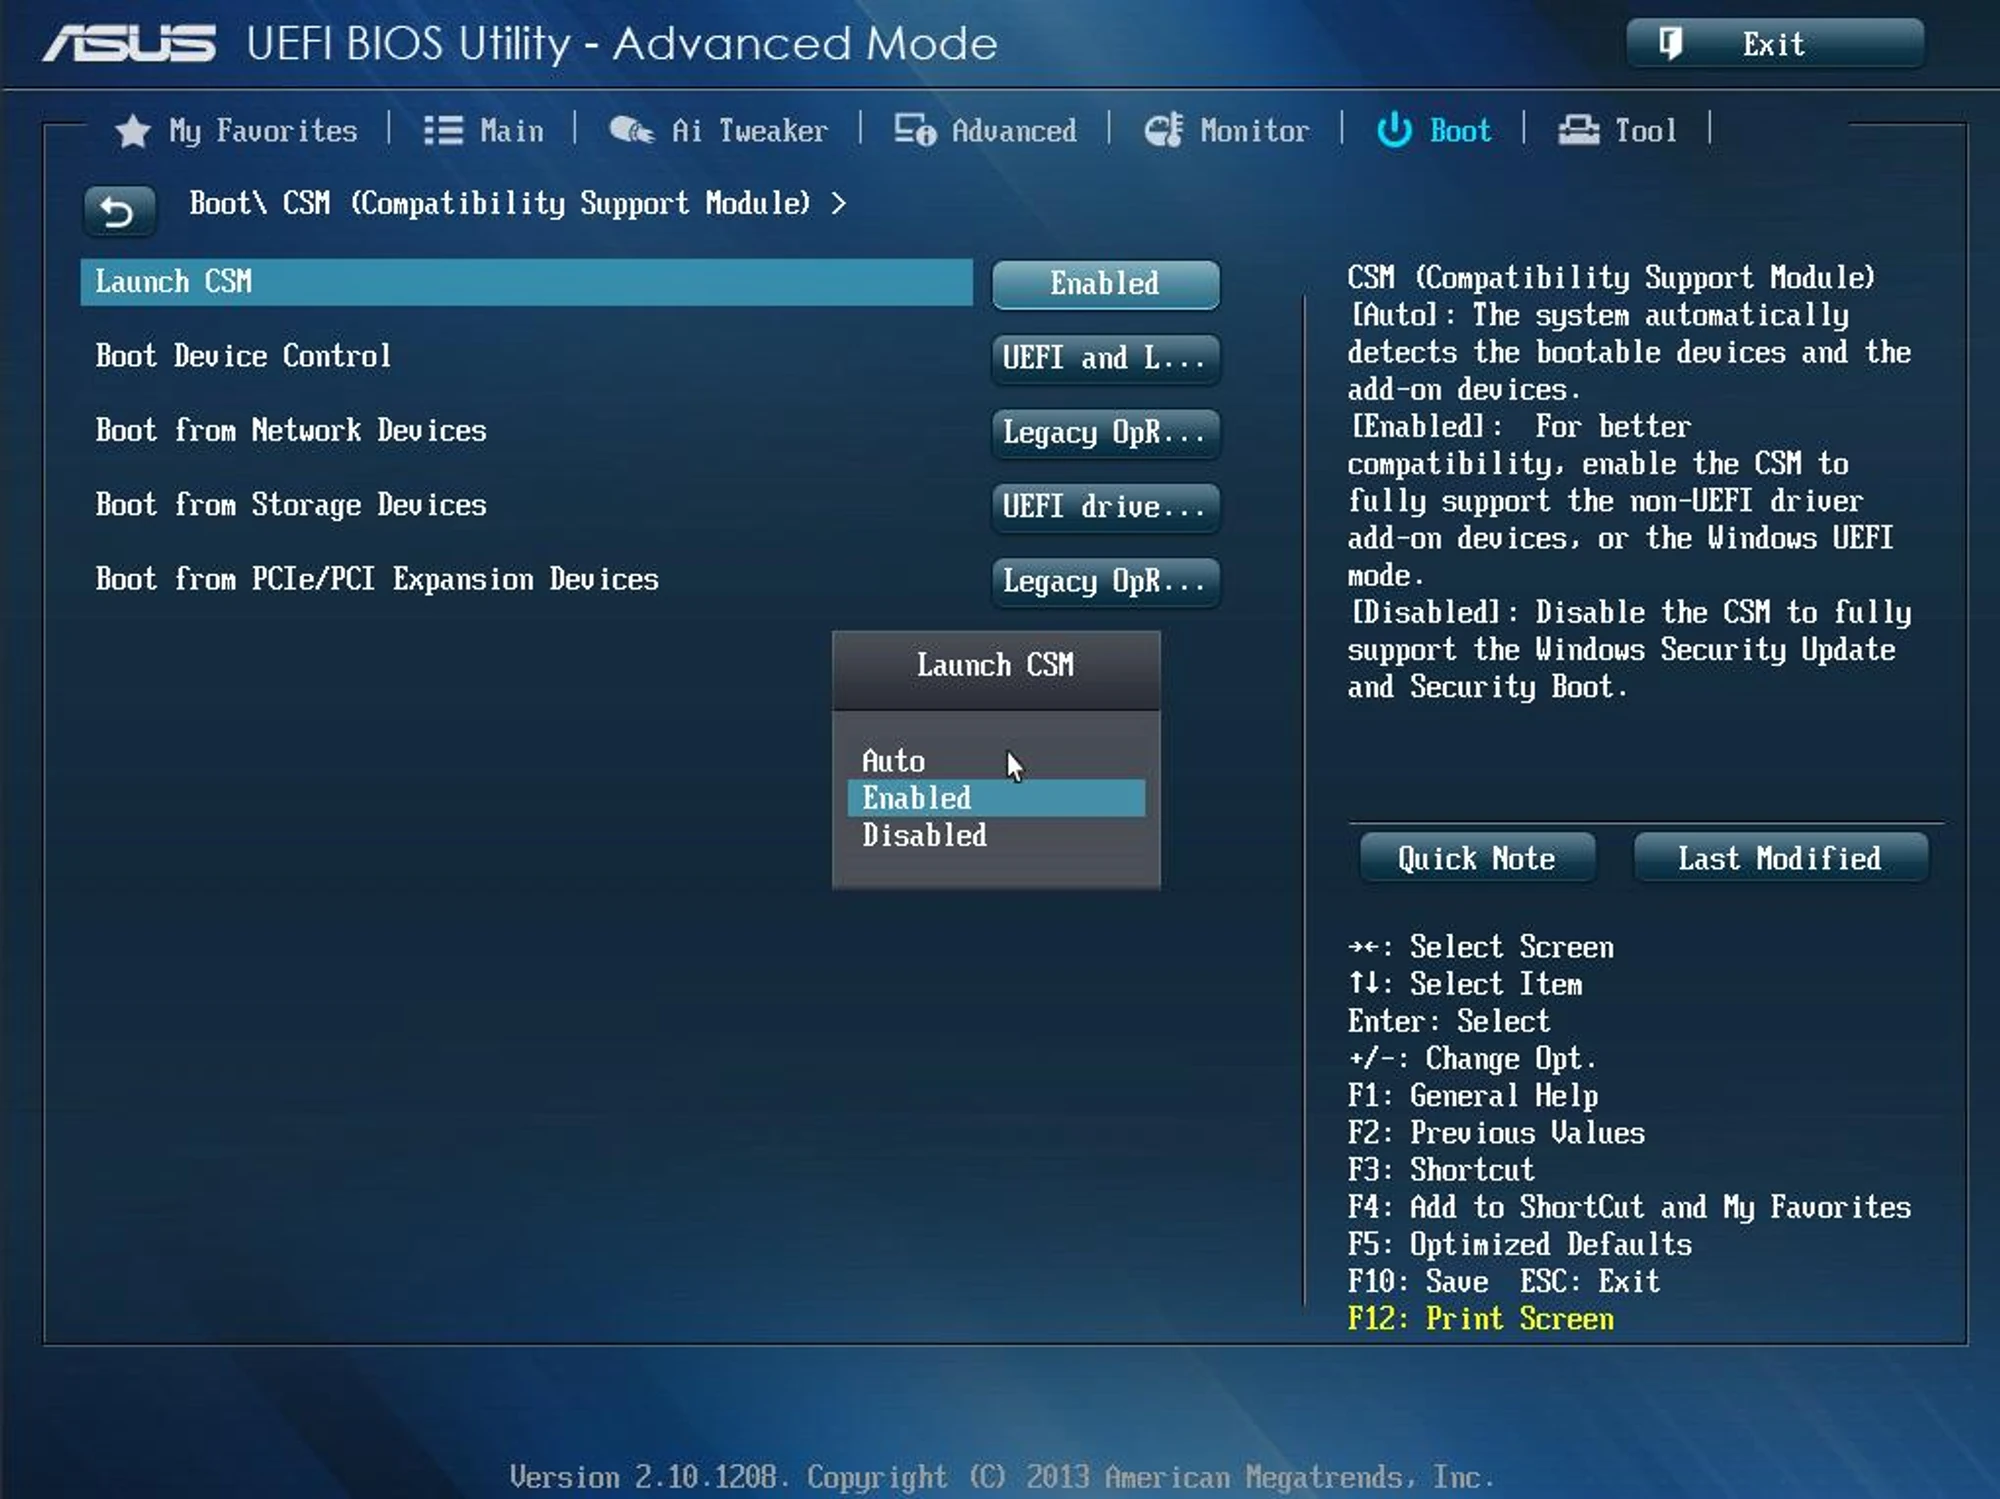
Enable "CSM" Mode
Launch CSM or CSM Mode (Compatibility Support Mode - improved UEFI compatibility mode with devices that do not have UEFI drivers). It is an additional tool that provides legacy BIOS compatibility.
- After entering the BIOS, you need to go to the BOOT section. It is there that the Launch CSM or CSM Mode function is located, which is disabled by default [Disabled] or [Auto];
- To enable CSM mode, select the [Enabled] option.
If the CSM mode in the BIOS is not active, then you need to do the following:
- Go to the Security tab;
- Disable the Secure Boot Control setting by setting it to [Disabled];
- Save changes;
- Re-enter the BIOS.
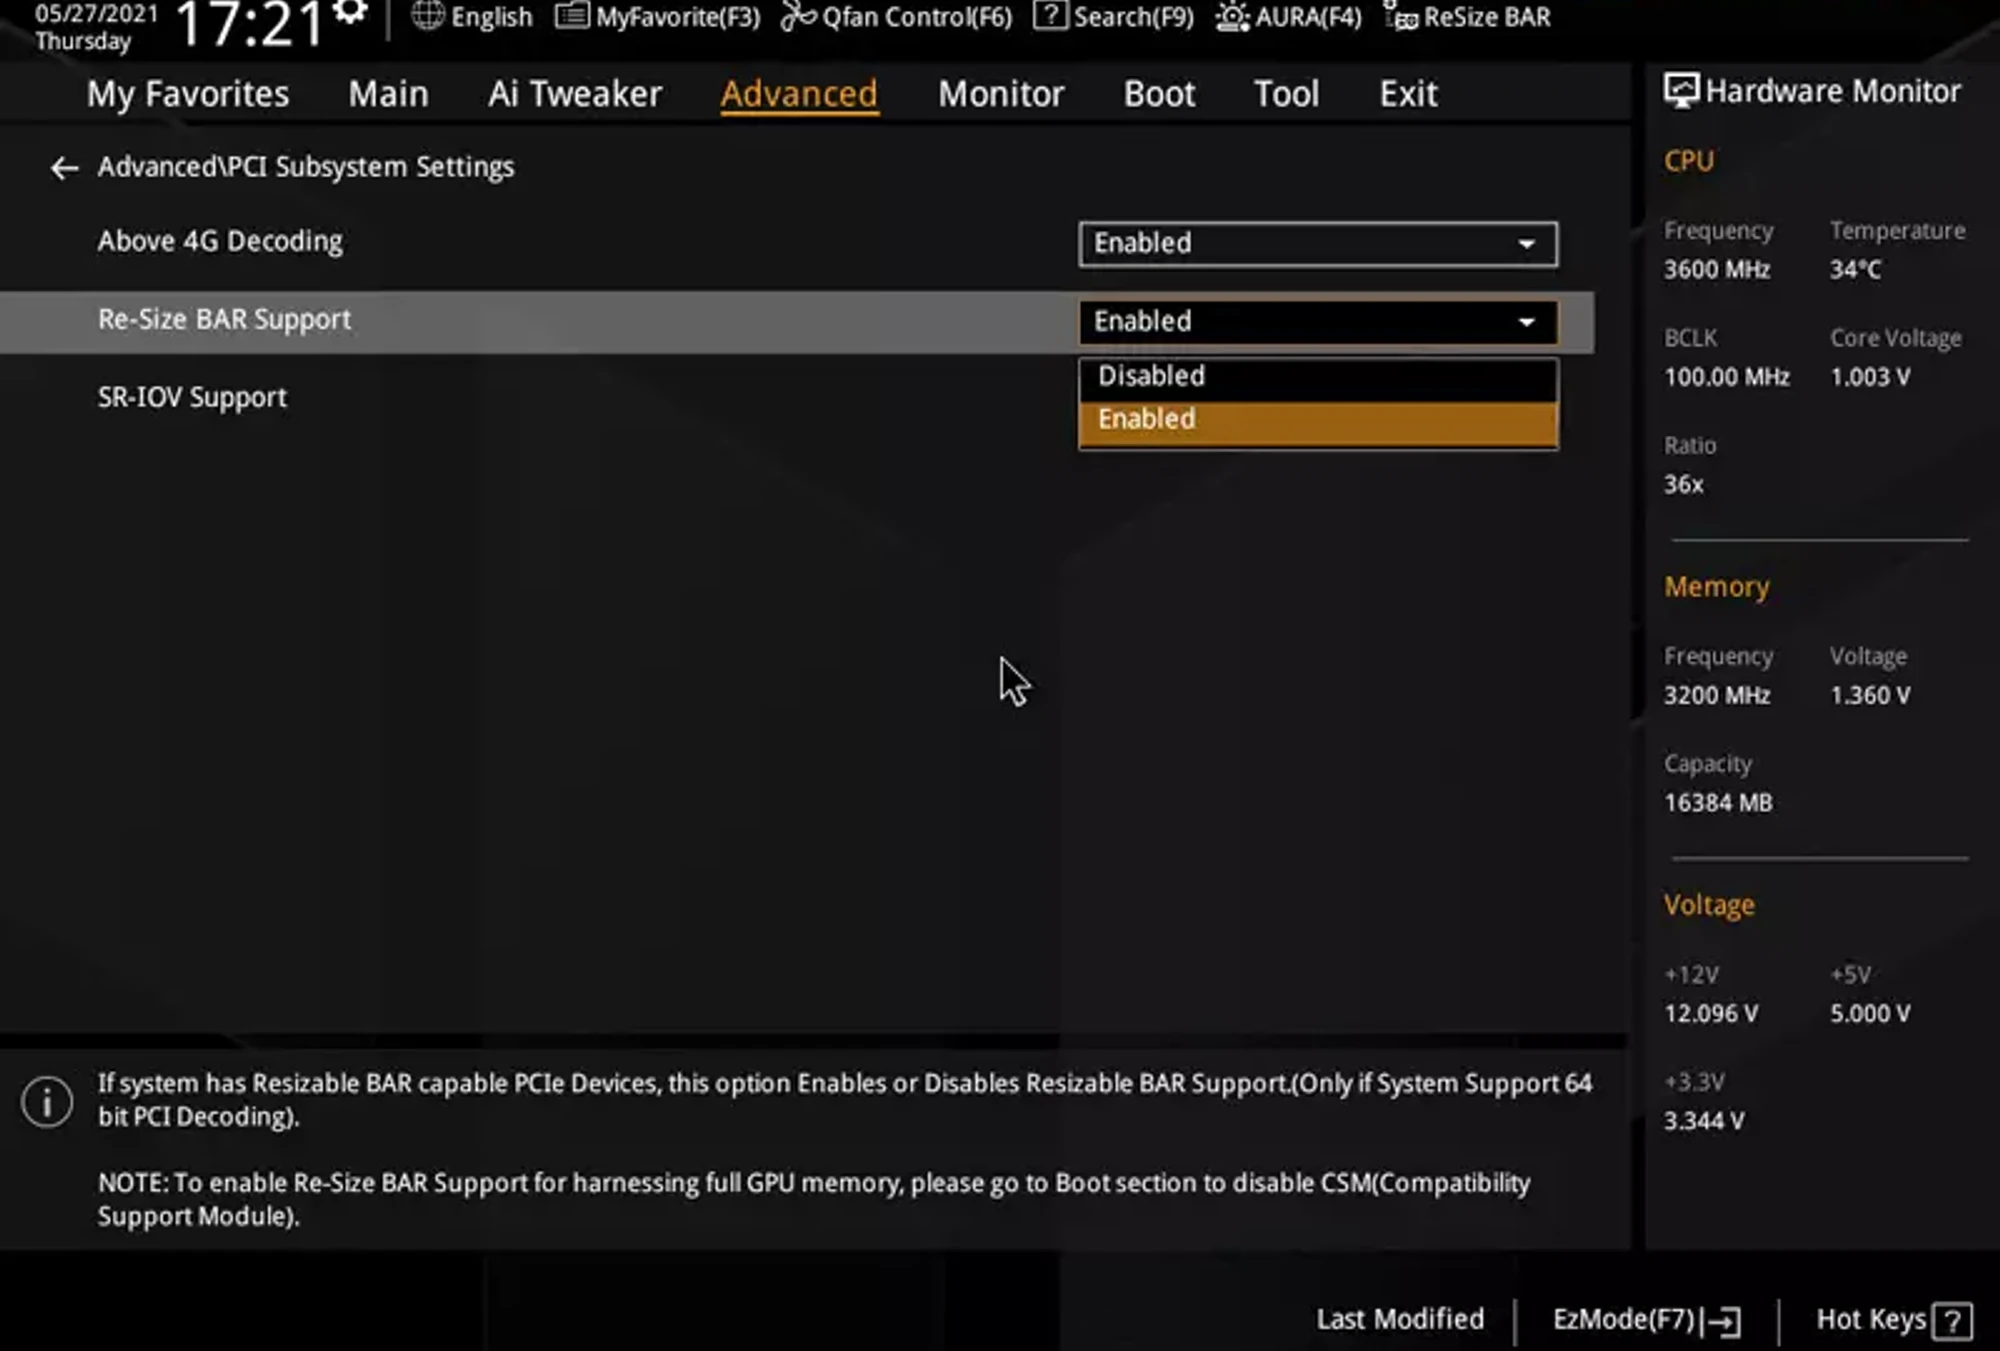
Enable “(Dynamic) Resizable Bar”
Resizable Bar will only work if your system drive is UEFI compatible and has a GPT partition table. The legacy MBR format is not supported. If the system was installed using the older method with an MBR boot area, the Resizable Bar technology will not be enabled.
The essence of Resizable BAR is that processors (CPUs) can access the entire amount of graphics memory, and not just a part (256 MB), as it was before. Requests are not queued, but processed in parallel.
- After switching to the BIOS, you need to go to the Advanced section.
- To enable the Resizable Bar, select the [Enabled] option in the PCI Subsystem Settings.
Everything's failed! 😱
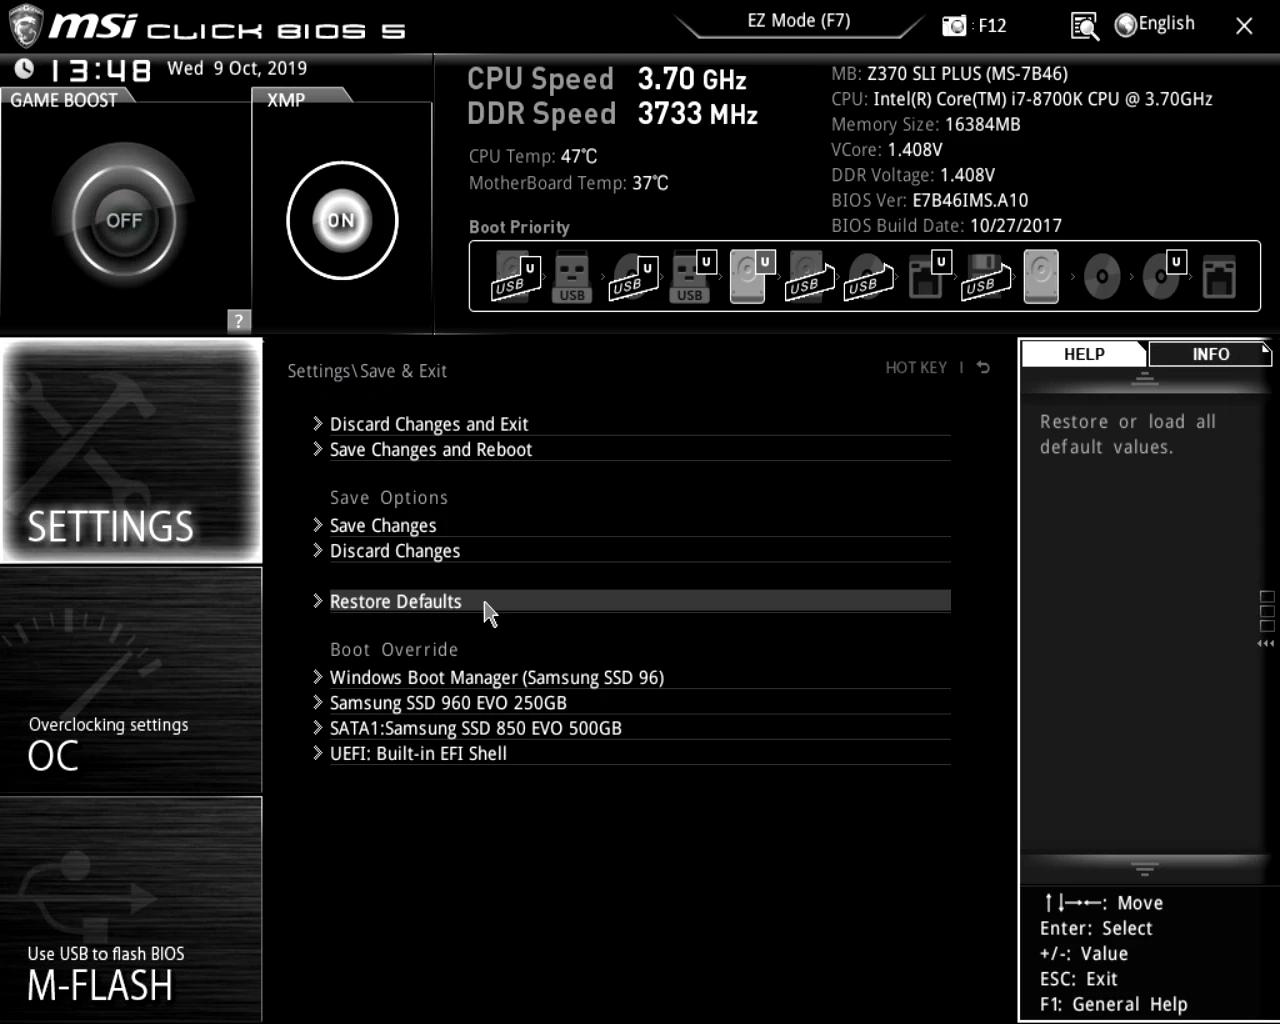
If the system doesn't work properly after configuring the BIOS, just reset it to the factory settings!
Open the BIOS and select Load Setup Defaults, then save your settings.
Failed to reset the BIOS. Is the computer frozen and does not respond to commands? Reset CMOS:
- Unplug your PC from the outlet;
- Remove the side cover to access the PC components;
Locate the battery on the motherboard (every PC has one), and carefully remove it (you may need a flathead screwdriver);
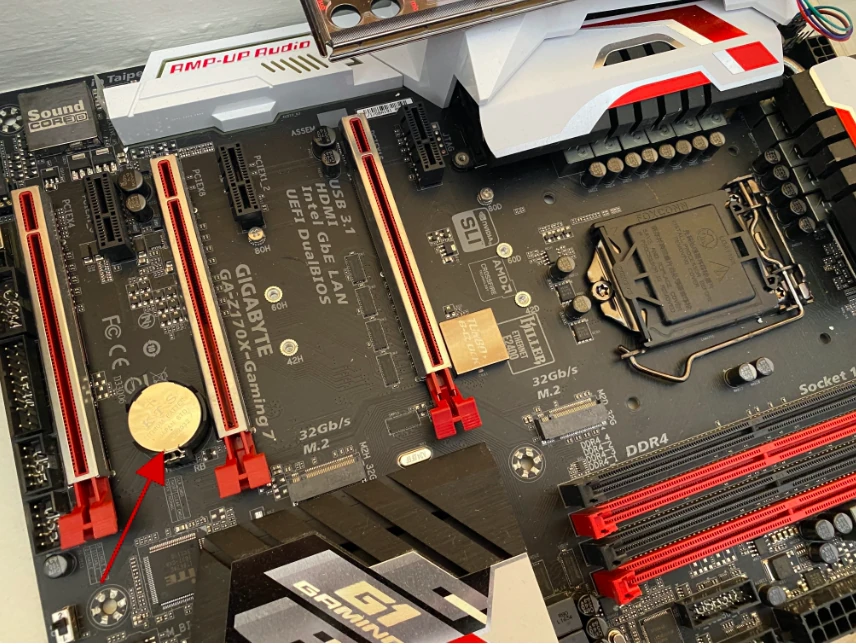
Wait 1 minute and put the battery back;
- Plug the PC back into the outlet and start it up. Ready!
Need Help?
Have any questions, something is unclear, or you can't connect?
Contact support — we're happy to assist!
- Support Ticket.
- Telegram Support.
- Discord Support.
- Email support at support@kryptex.com.
