

🛠️How to Maintain Your Graphics Card: A Complete Guide to Cleaning, Disassembly, and Component Replacement
Summer brings vacations, heat, and GPU overheating — especially if your graphics card runs 24/7 for mining. At times like this, proper maintenance isn’t a luxury — it’s a necessity. This friendly guide comes from people who have saved their GPUs from overheating multiple times. Let’s get started 🚀
Why Maintain Your Graphics Card?
Summer & Overheating
As temperatures rise, even the most powerful cooling systems may struggle to dissipate heat. Dust buildup, dried thermal paste, and clogged heatsinks make things worse. This can lead to Throttling (performance drops due to overheating), System instability, Potential hardware failure. If your GPU temperature exceeds 85°C, it’s likely that thermal paste has dried out, thermal pads have lost elasticity, the heatsink is clogged with dust.
How Cleaning Improves Performance
After proper cleaning and thermal interface replacement, your GPU will cool more efficiently, fans will spin freely, temperatures will drop by 10–20°C, system stability will improve. For miners, this is especially important — your GPU is a tool that must run flawlessly.
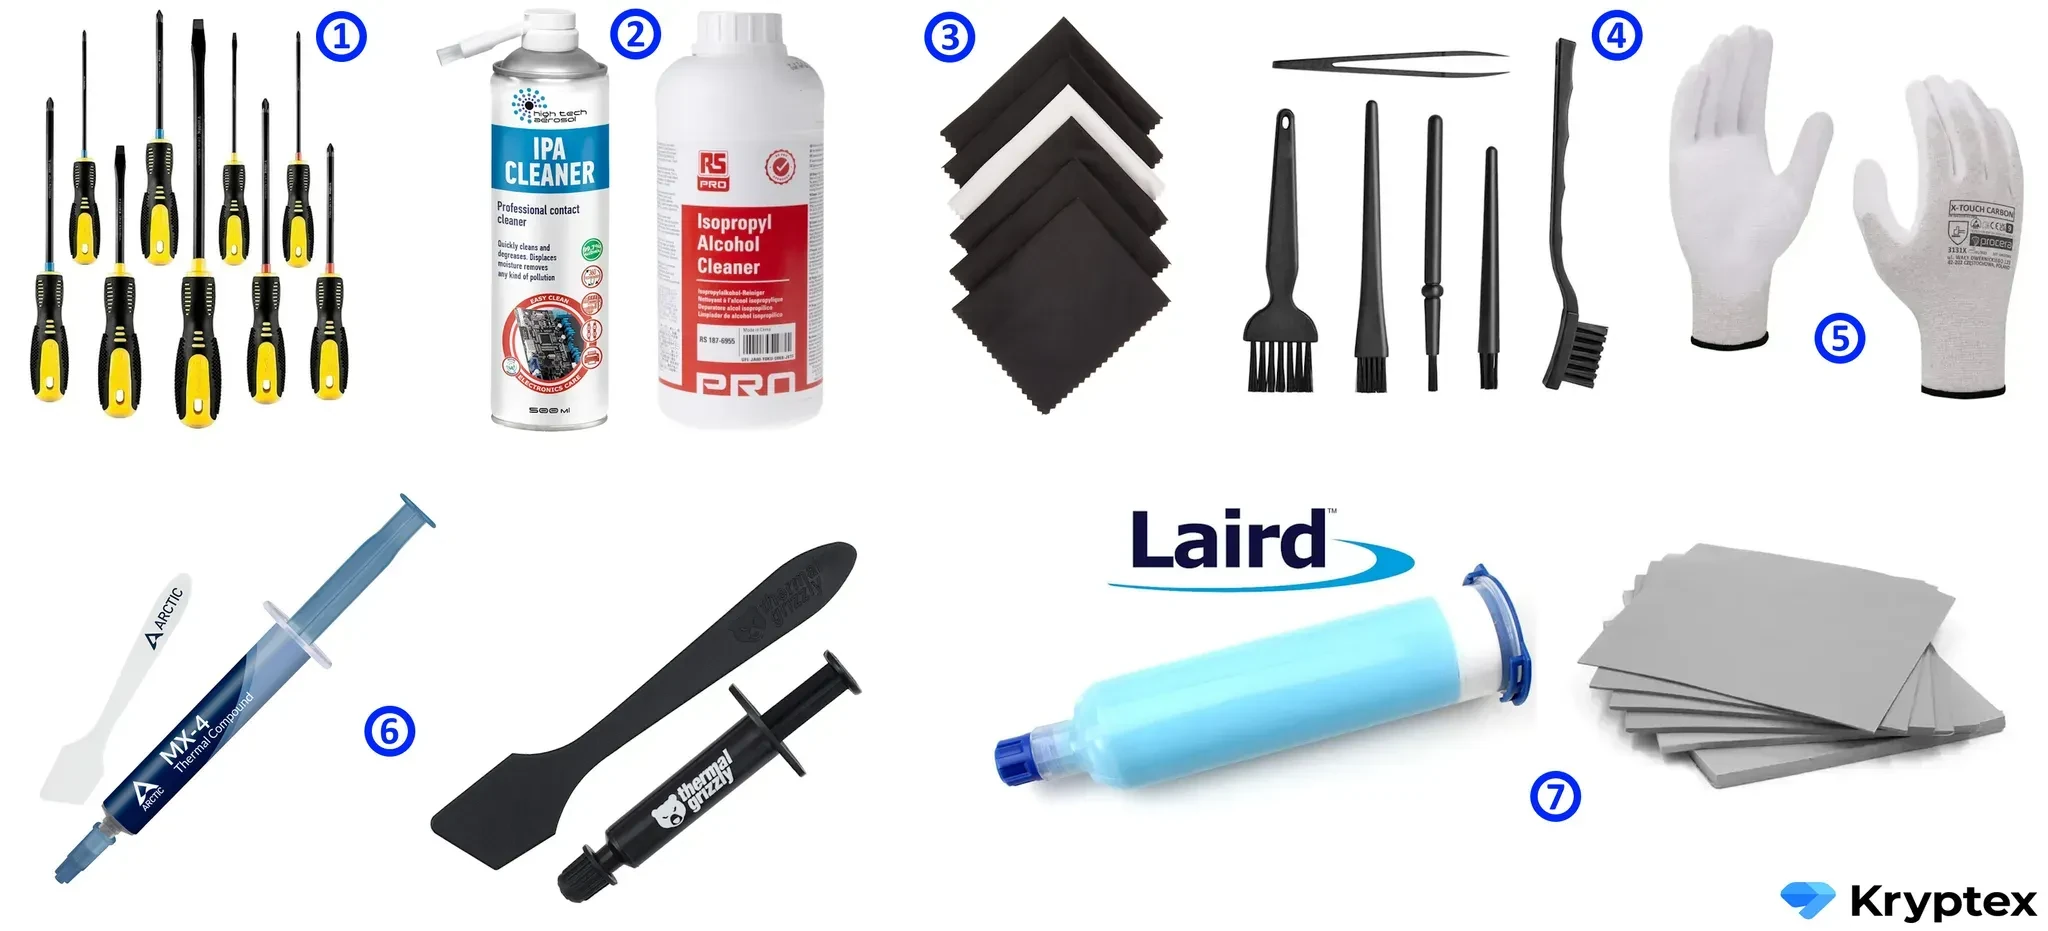
Essential Tools for GPU Maintenance
Before you begin, make sure you have everything you need:
- Screwdriver set or electric screwdriver with interchangeable bits.
- Isopropyl alcohol (90% or higher).
- Soft cloth and cotton swabs.
- Soft brush for dust and dirt removal.
- Anti-static gloves (recommended).
- New thermal paste (Arctic MX4/MX6 or Thermal Grizzly Kryonaut for high thermal conductivity).
- Thermal pads (Laird 607 liquid pads or solid ones if thickness is known). You can measure thermal pad thickness using calipers or modeling clay.
- Plastic card or spatula (for removing old thermal paste and applying new paste—usually included with thermal paste).
Key Points to Keep in Mind During Maintenance
- Take photos at each stage — it will make reassembly much easier.
- Keep screws organized — store them separately or in labeled containers.
How to Properly Disassemble a Graphics Card
Removing the GPU from Your PC
- Turn off the PC (switch off the power supply or unplug it).
- Disconnect the power cables from the GPU.
- Carefully remove the GPU from the PCIe slot, pressing the latch to release it.
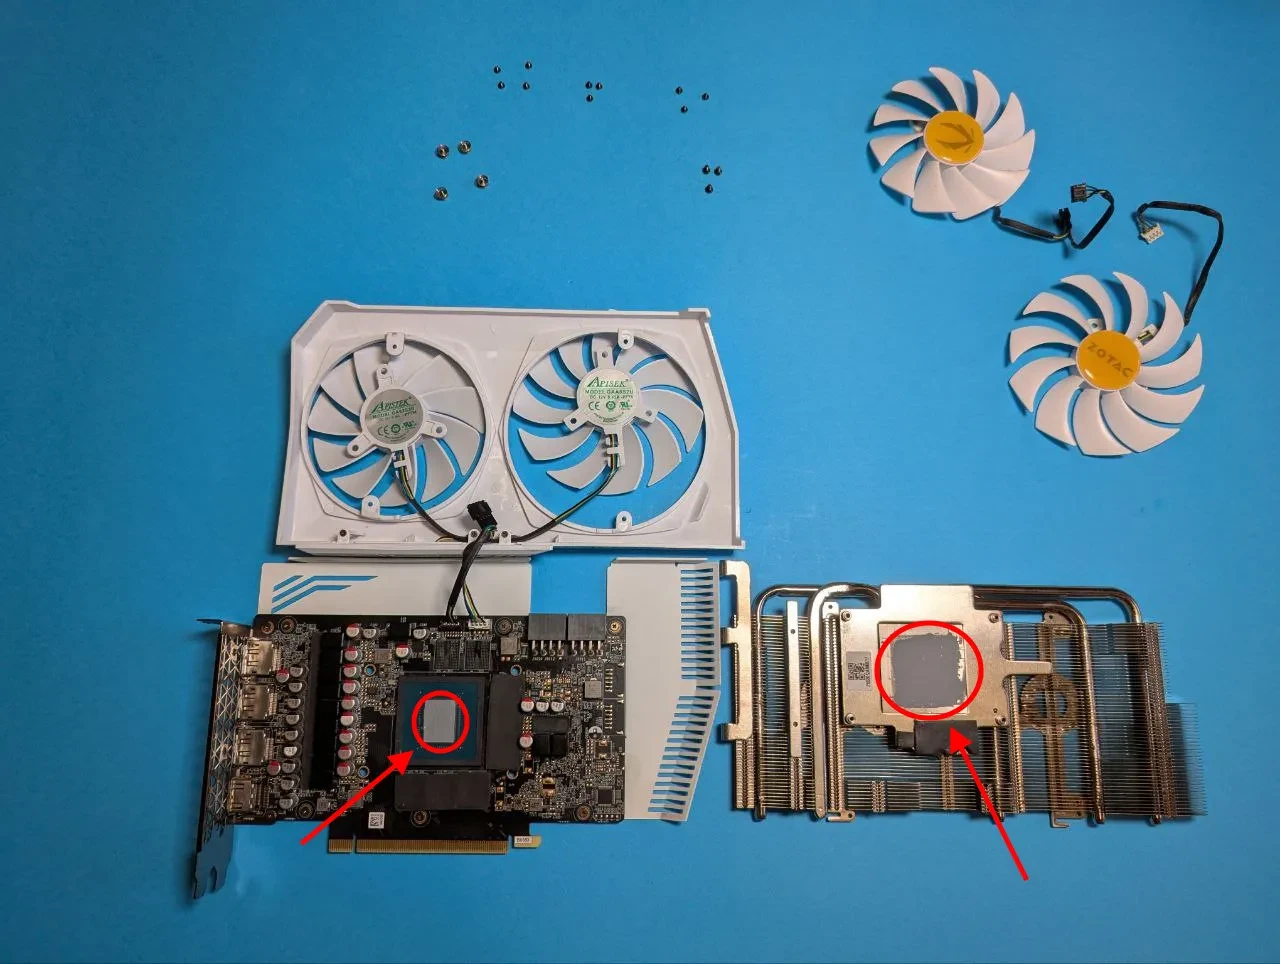
Removing the Plastic Shroud
The shroud is usually secured with multiple screws, which may be located on the back, sides, or under the fans, depending on the GPU model.
Unscrew all bolts, keeping track of their placement.
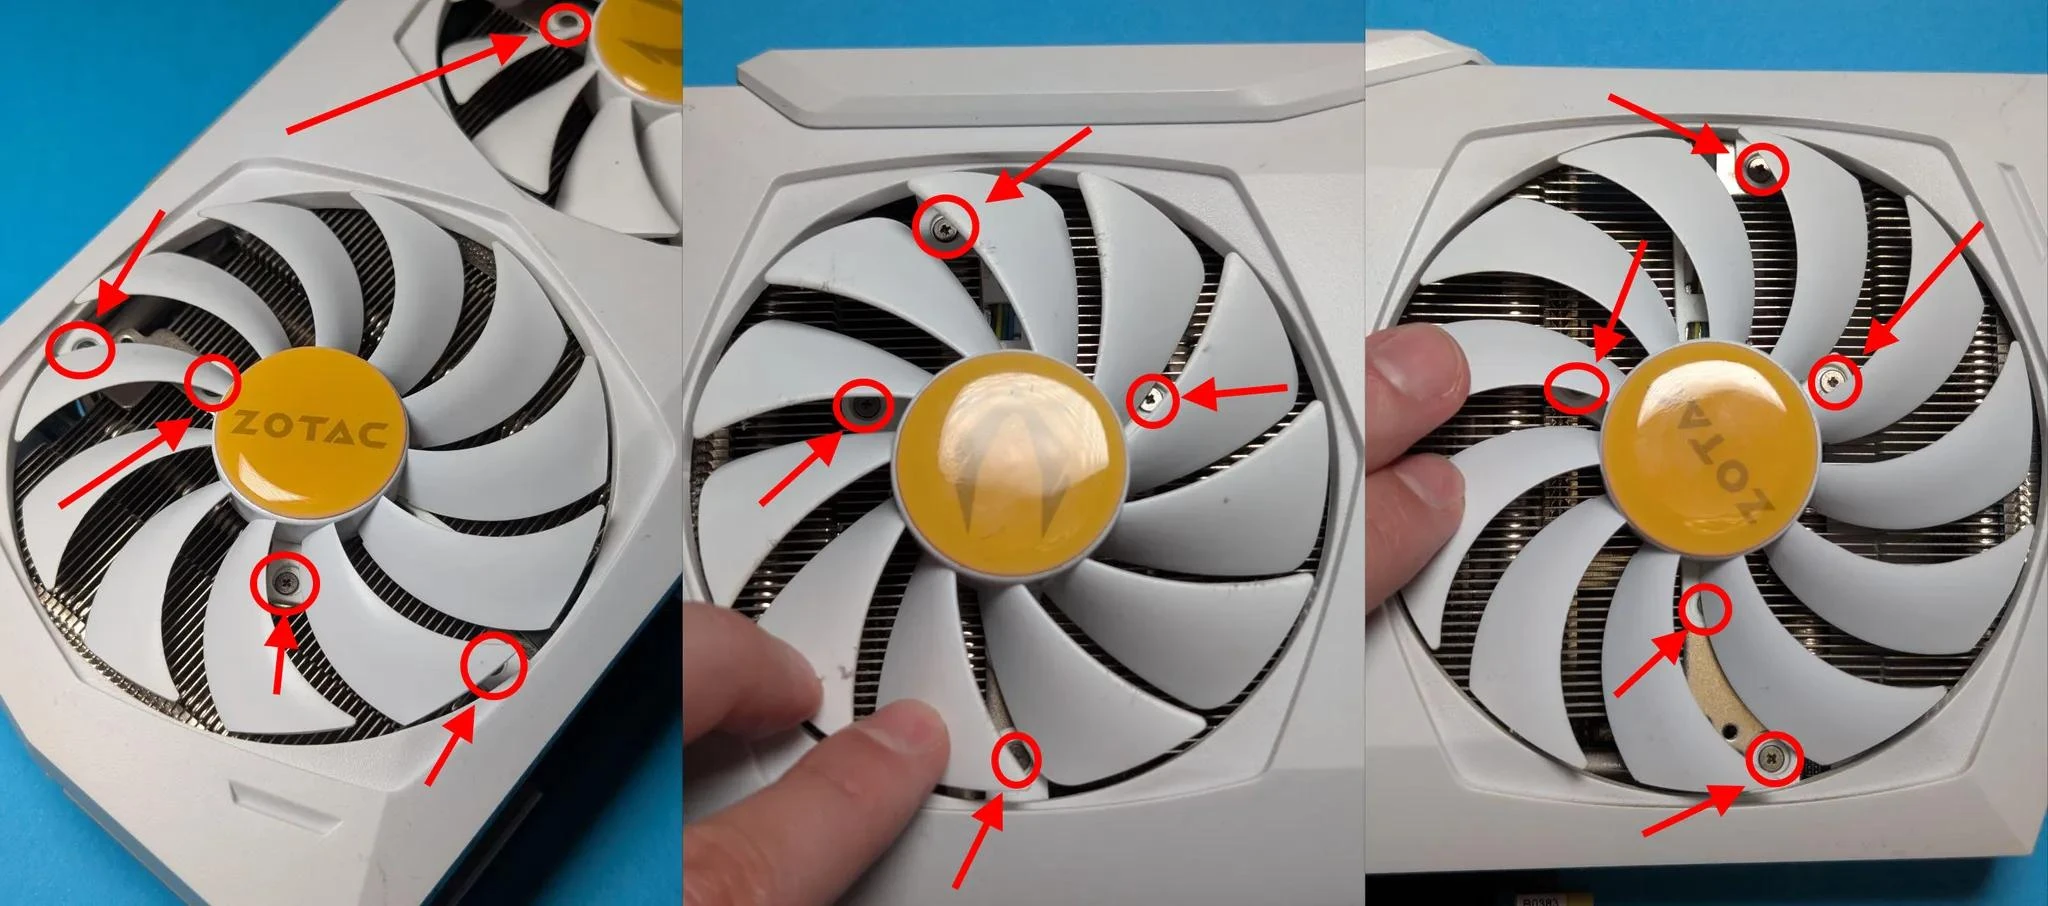
Gently pry off the shroud — watch for clips and fan cables that may be attached.
Disconnect the fan cables from the PCB if they are accessible and not blocked by the heatsink.
📸 Take photos at each step to make reassembly easier!
Some models, like the RTX 3070 Gigabyte, may have hidden clips that are difficult to locate—using a plastic pry tool can help.
ASUS Strix GPUs often have long screws securing the shroud—removing them carelessly can damage fan wires, so proceed with caution.
Cleaning Graphics Card from Dust
Safe Cleaning Methods
- Use compressed air or a compressor to remove dust from the heatsink and PCB. Hold the fans in place while blowing air — spinning them can generate static electricity. Avoid using a vacuum cleaner.
- Use a soft brush to remove remaining dust and dirt from the surface and hard-to-reach areas.
- Do not touch chips or contacts with your fingers — this can leave oily residue.
- Never pour alcohol directly onto the PCB. If you need to clean a specific spot, moisten a cotton swab with alcohol and gently wipe the area.
How To Replace GPU Fans
If your fans make grinding noises, clicking sounds, or stop spinning altogether, their bearings are likely worn out, and it's best to replace them entirely.
How to Choose a Replacement Fan
Select fans based on your GPU model or the markings on the existing fans.
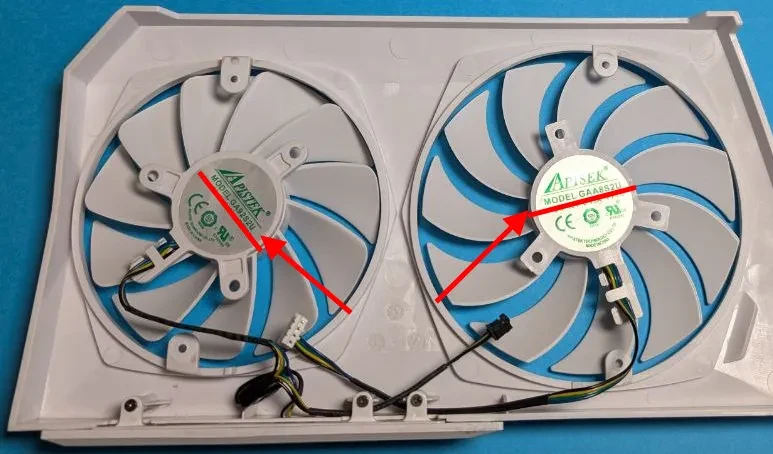
Pay attention to the connector type (2-pin, 3-pin, or 4-pin).
- Check the diameter, as fans come in different sizes.
How to Unscrew and Replace a Fan
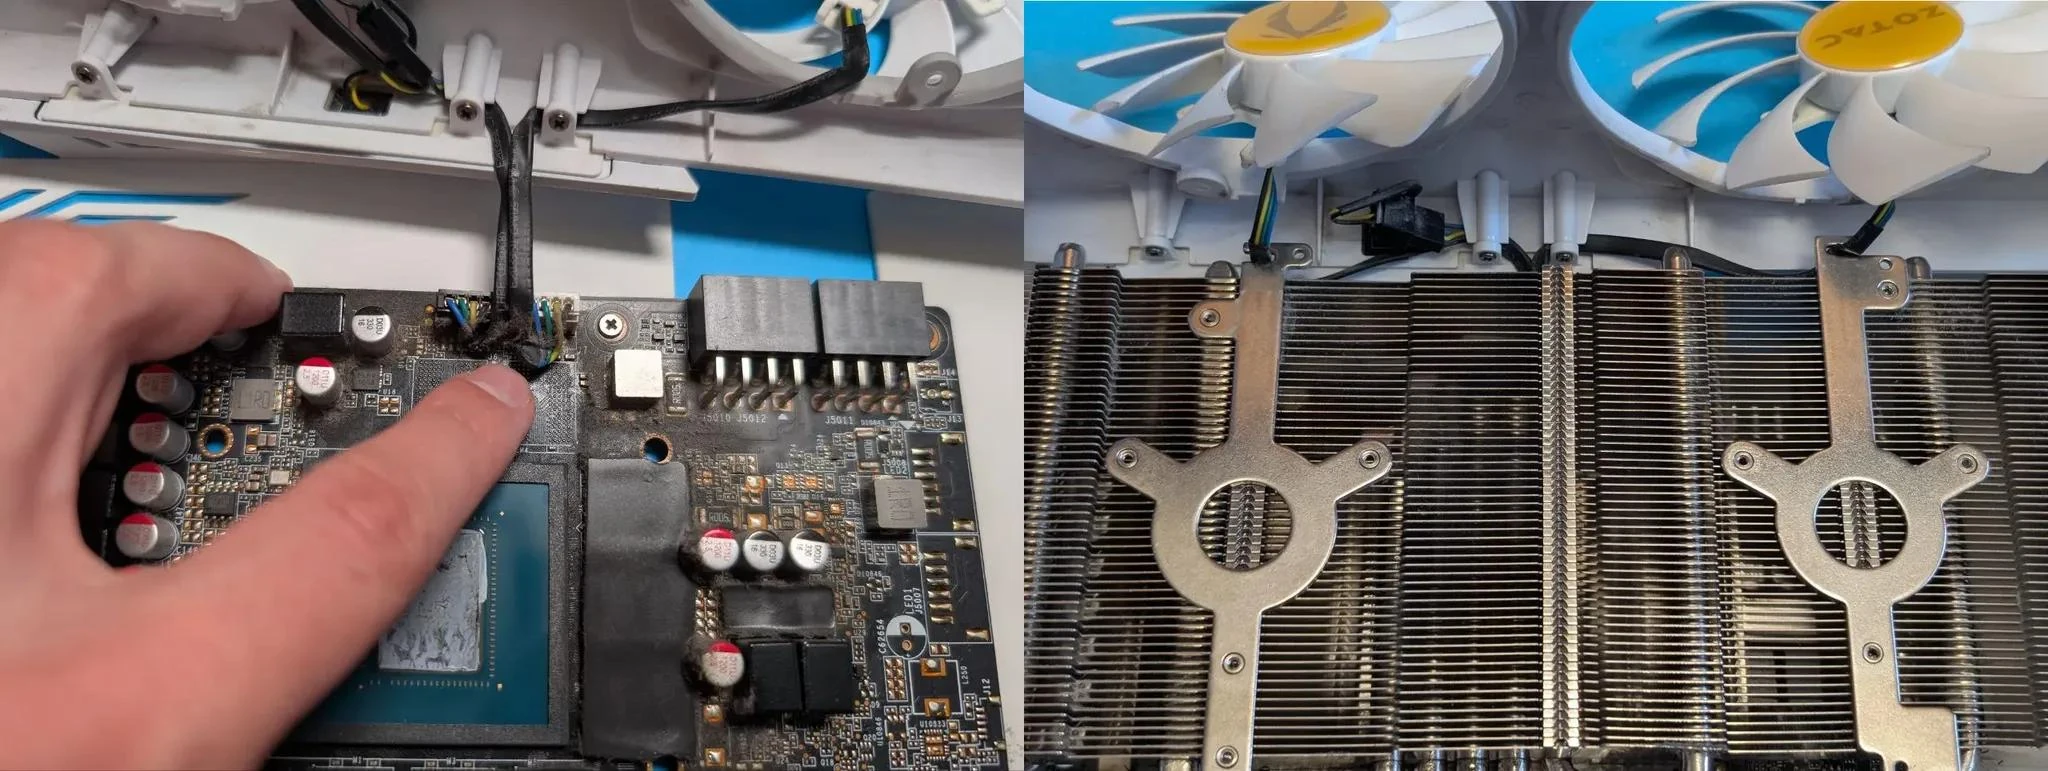
Unscrew the fan mounting bolts — fans are usually attached to the shroud or directly to the heatsink.
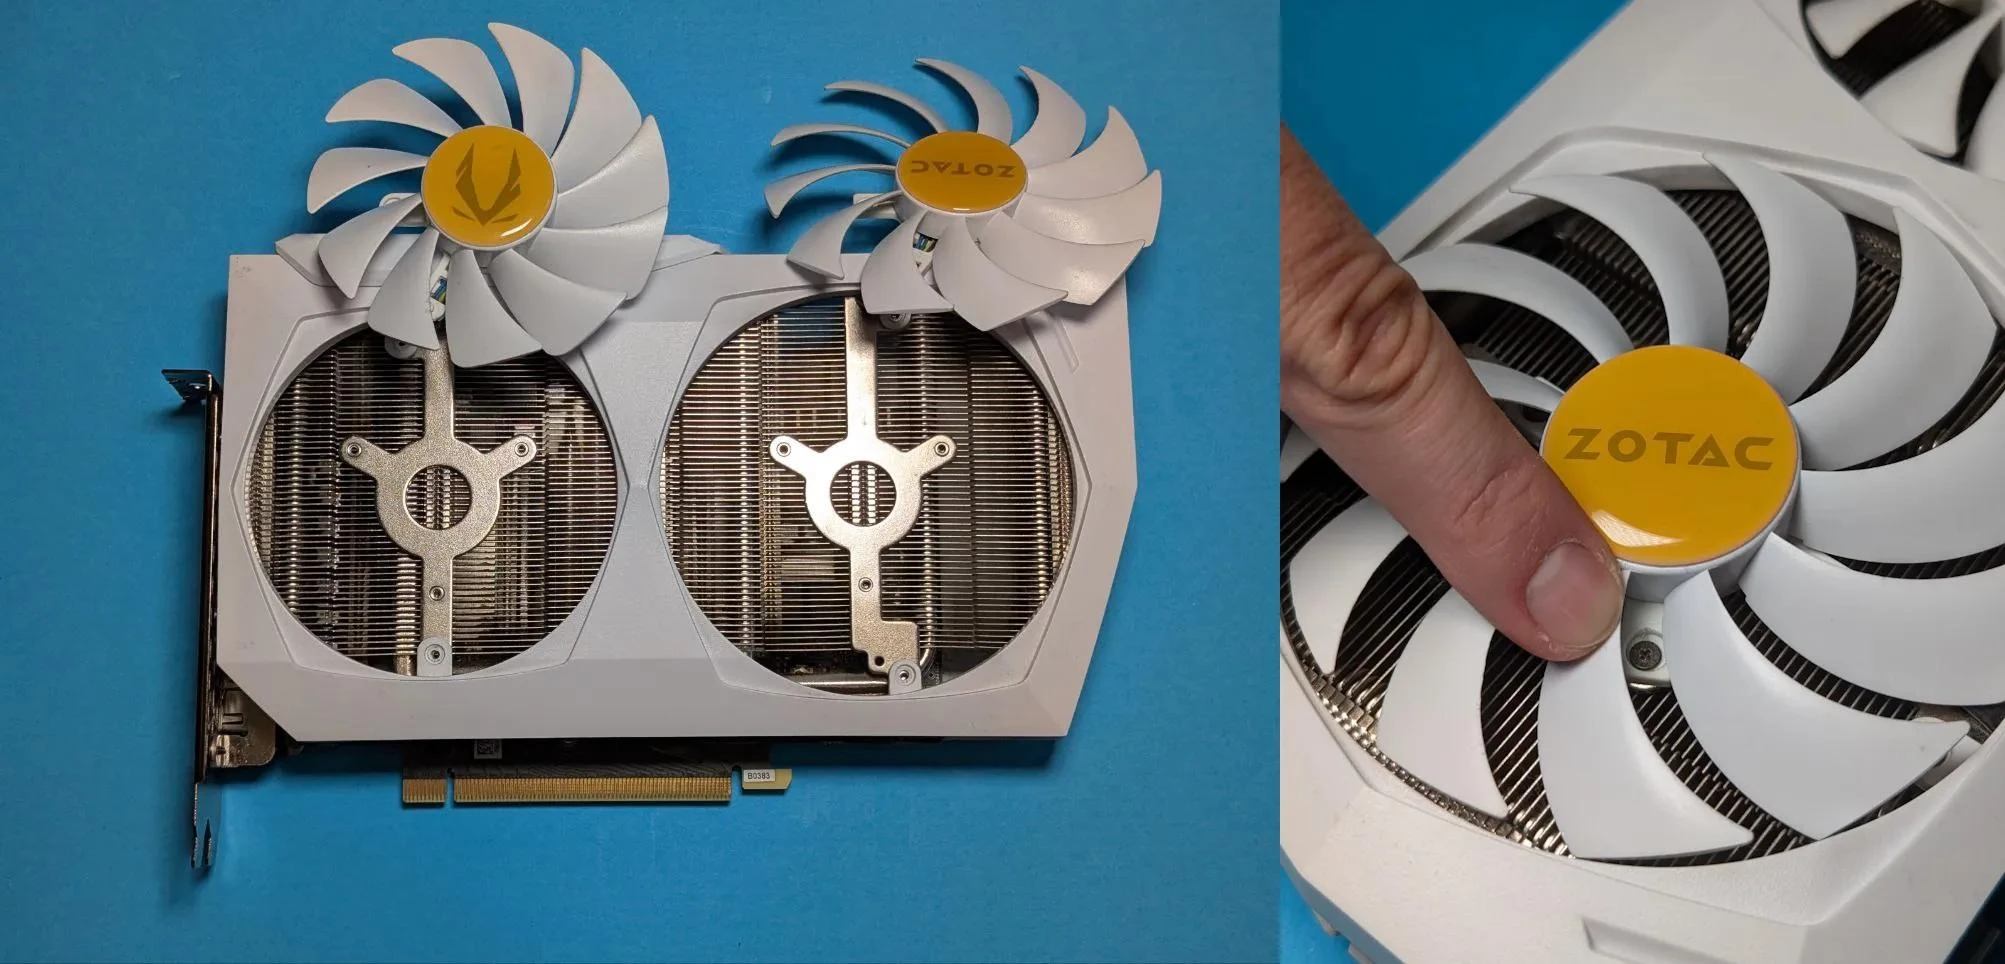
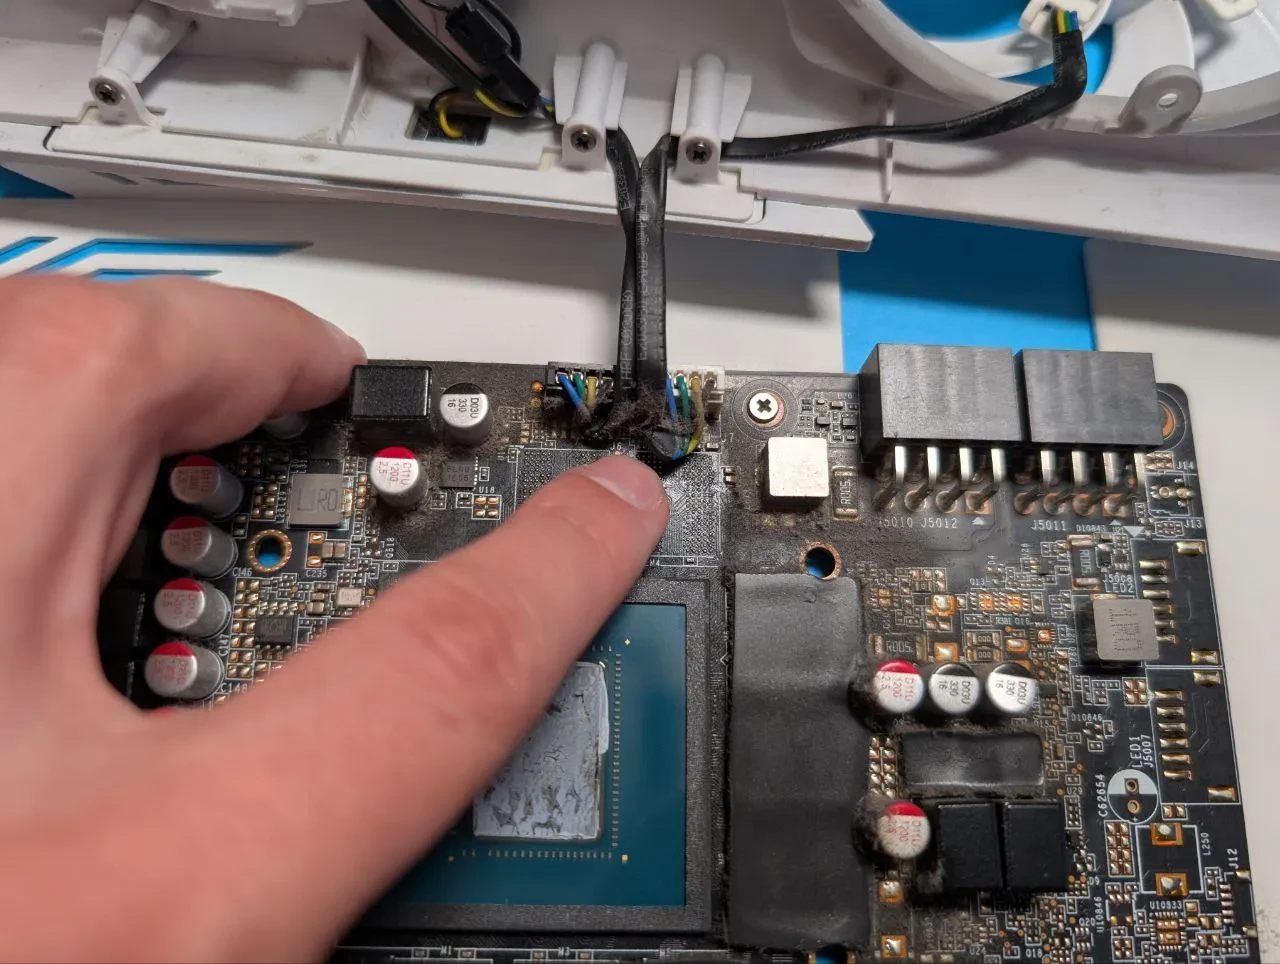
Disconnect the fan cable from the PCB.
Install the new fan, reconnect the cable, and secure it in place.
On MSI Gaming X GPUs, fans are connected via a single connector, while on ZOTAC AMP GPUs, each fan has a separate cable.
📌 Make sure to remember the wiring layout and installation order to avoid mix-ups during reassembly.
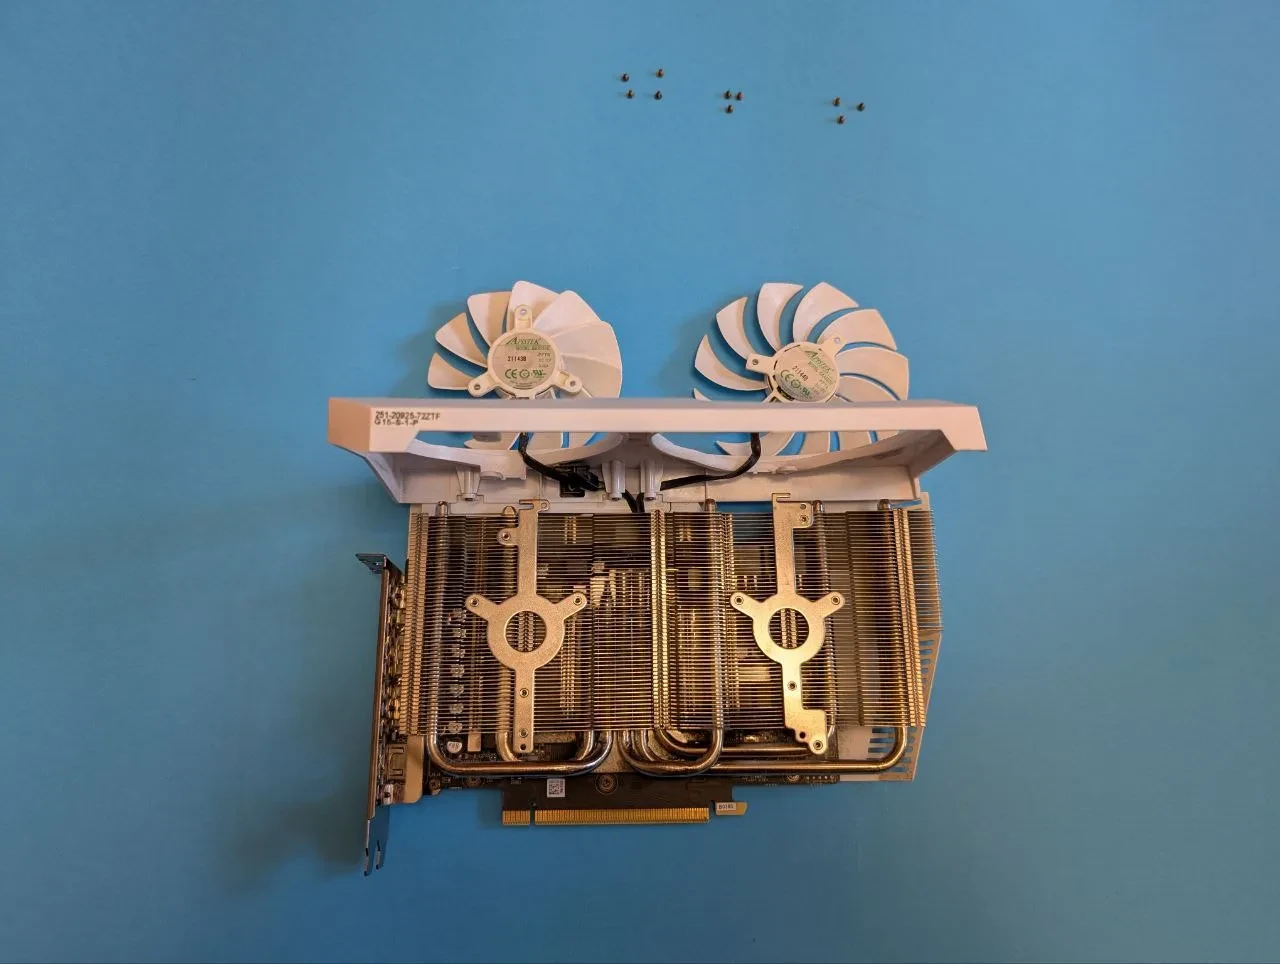
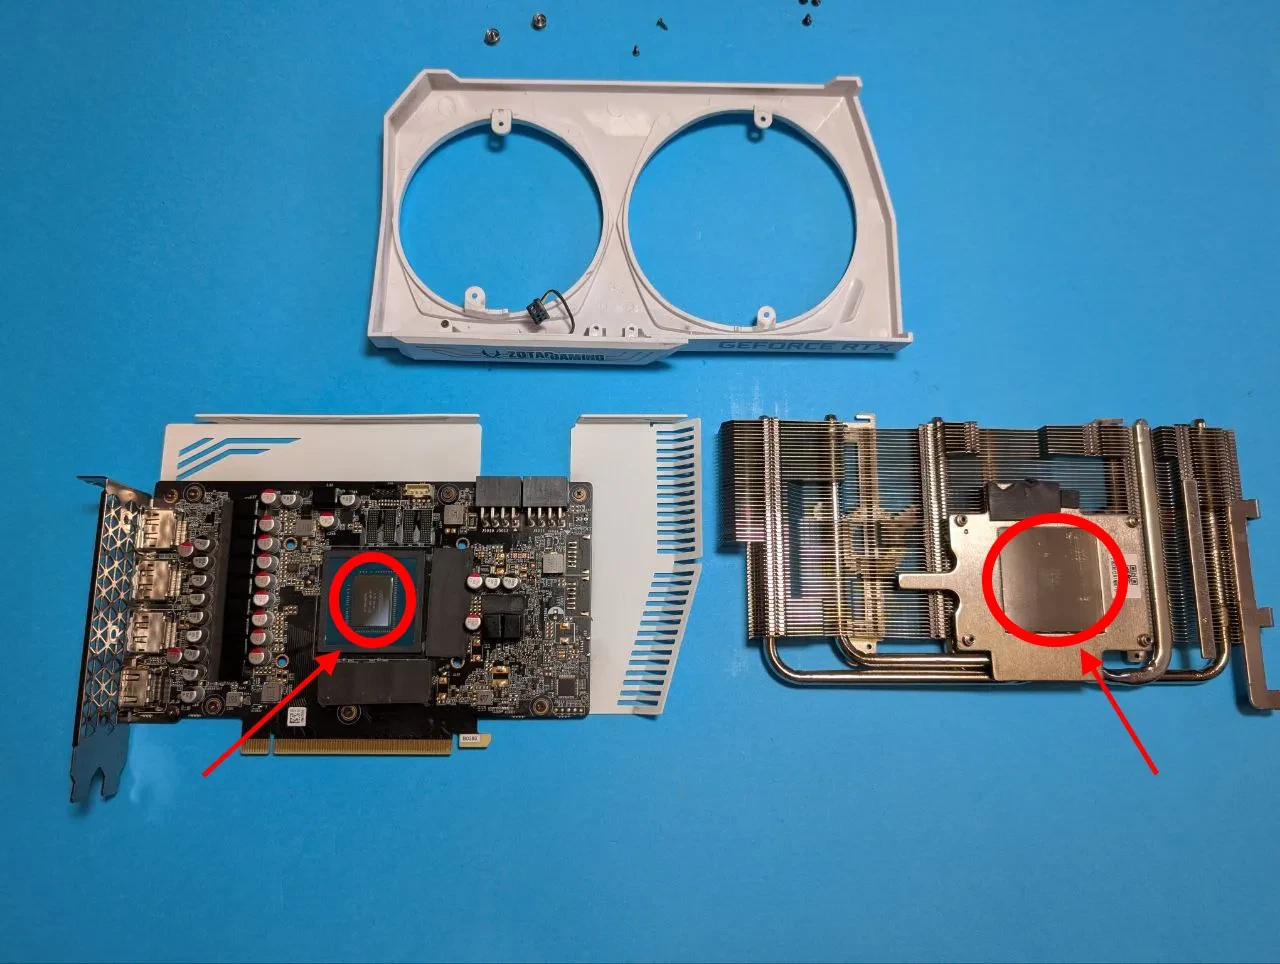
How to Remove a GPU Heatsink
Unscrew the bolts securing the heatsink.

Carefully lift the heatsink — it may be stuck to the thermal paste. Never pull forcefully—this can damage fragile components! Instead, gently rock it side to side until it separates. Preheating the GPU in stress tests before disassembly can make removal easier.

Disconnect all cables attached to the heatsink.

How to Replace Thermal Paste on a Graphics Card
Which Thermal Paste to Choose
- Arctic MX-4 — A reliable, affordable, and versatile option.
- Thermal Grizzly Kryonaut — Ideal for maximum performance.
How to Apply It Correctly
Clean off the old thermal paste from the GPU chip and heatsink using isopropyl alcohol.
Apply a pea-sized drop of thermal paste to the center of the chip. Avoid using too much.
Spread the paste evenly using a spatula or plastic card.
📌 Not confident in spreading it evenly? No worries—the heatsink will naturally distribute the paste when installed.
Selecting and Replacing Thermal Pads
How to Measure Thickness
Before disassembling your GPU, it’s best to determine the correct thermal pad thickness in advance.
You can find useful information from online forums and user experiences where people have shared their GPU maintenance details.
Alternatively, you can contact your GPU manufacturer’s support and request the official thermal pad specifications for your model.
If these options aren’t available, you can measure the thickness manually. Use calipers to check the thickness of the installed thermal pads. If the old pads are damaged, calipers won’t work — try the modeling clay method: remove all thermal pads. Place small pieces of modeling clay where the pads were. Lightly press the heatsink down. Remove the heatsink and measure the compressed clay to determine the correct thickness.
📌 Most GPUs use thermal pads ranging from 0.5mm to 2mm.
Where Are Thermal Pads Located?
Thermal pads are typically placed on the VRM, memory chips, and sometimes inductors.

How to Replace Thermal Pads
- Remove the old pads using tweezers.
- Clean the surface with isopropyl alcohol.
- Cut new thermal pads to size and carefully place them in position.
Reassembling the Graphics Card After Maintenance
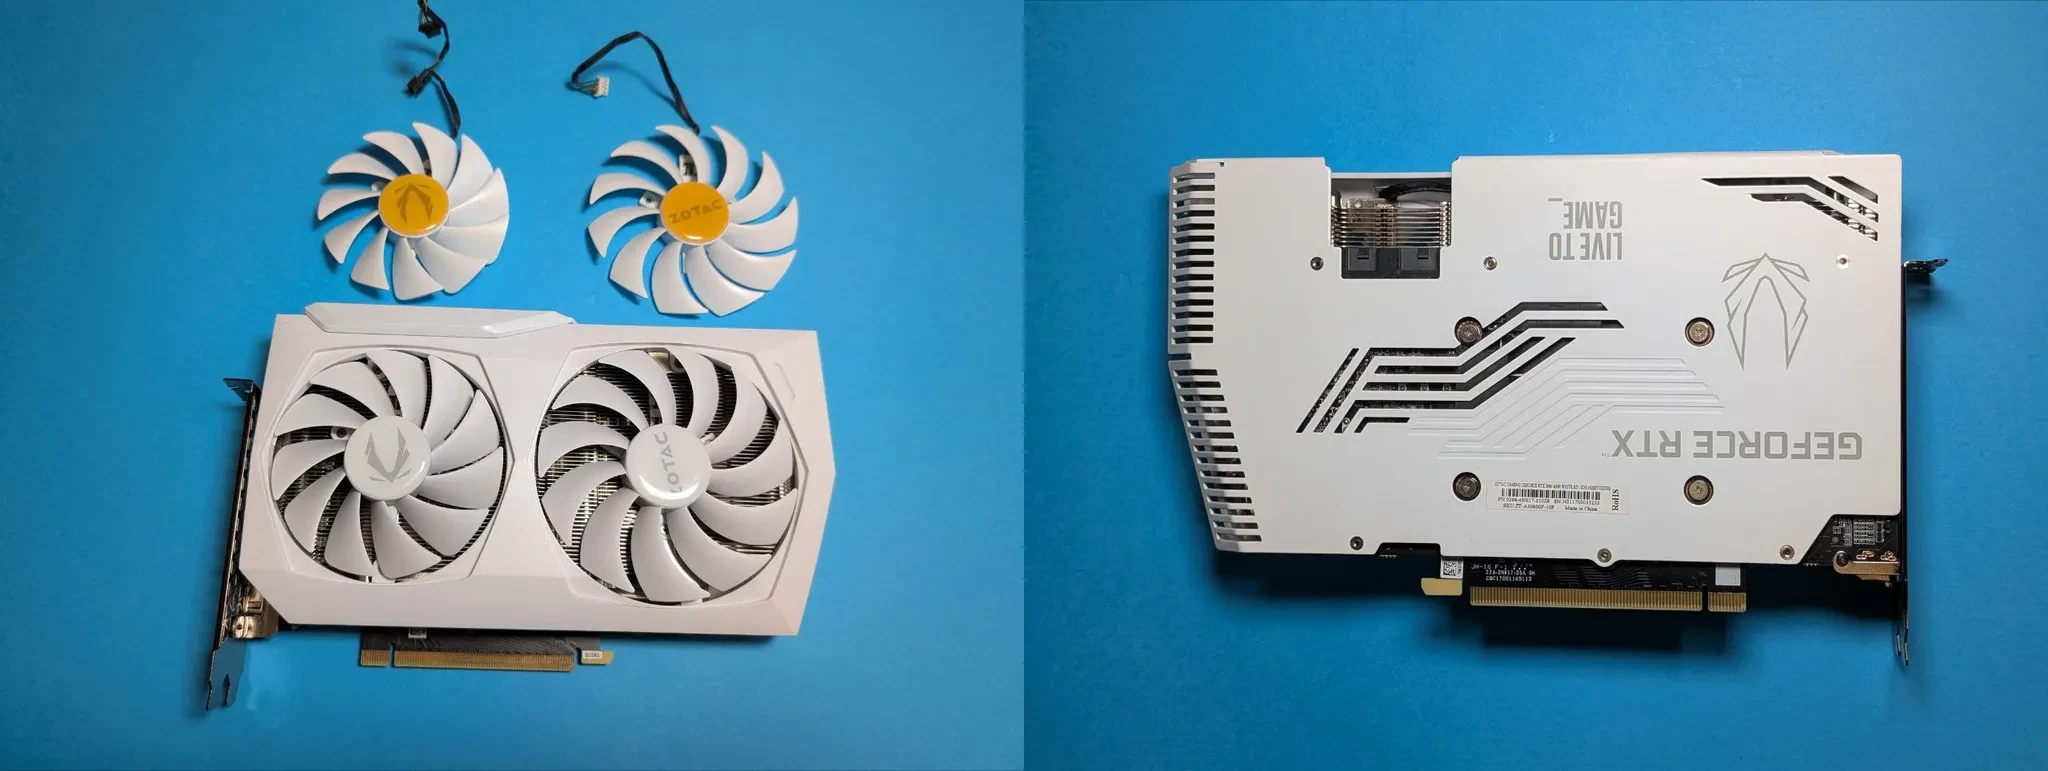
- Reassemble in reverse order.
- Do not fully tighten the screws immediately—first, secure them loosely, then gradually tighten.
- Tighten heatsink bolts in a crisscross pattern to ensure even pressure. Over-tightening can lead to cracks in the PCB.
- Double-check that all cables are properly connected.
Testing After Maintenance
- Use MSI Afterburner for GPU overclocking and fan control.
- Check fan operation and temperatures in games or stress tests (FurMark, MSI Kombustor).
- The temperature should drop and remain between 70–75°C under load.
Need Help?
Have any questions, something is unclear, or you can't connect?
Contact support — we're happy to assist!
- Support Ticket.
- Telegram Support.
- Discord Support.
- Email support at support@kryptex.com.
